

In today's article, we will learn how a basic Web API authentication works and which methods are used to access the Web API.
Later on, in the next article, we will demonstrate the OAuth2.0 and JSON Web Token (JWT).
- Basic Authentication
- OAuth2.0
- JWT
Source Code is available at Api_Project.
First, we will use a basic method/technique (Basic Web API authentication). Then, we will learn how a Web API credential passes from POSTMAN application to Web API and how a Web API first receives the credentials, authorizes or unauthorizes, and sends a response back. As we know, in the basic Web API authentication method, we use the credential as a username and password.
Lets's start step by step.
Step 1
First, we will create a simple database containing a single table.
Step 2
Then, we will create a simple ASP.NET MVC Web API project.
Step 3
Create a class for authentication (BasicAuthentication.cs).
Step 4
Create an Entity Framework DataModel and connect to the database.
Step 5
After that, we need to go to our controller and create a Get method to fetch the data from the database and return back.
Step 6
Finally, we will test our Web API using POSTMAN.
Step 1 - Create a simple Database
Lets' create a database with the name "BasicDb" and a single table with the name "Product".
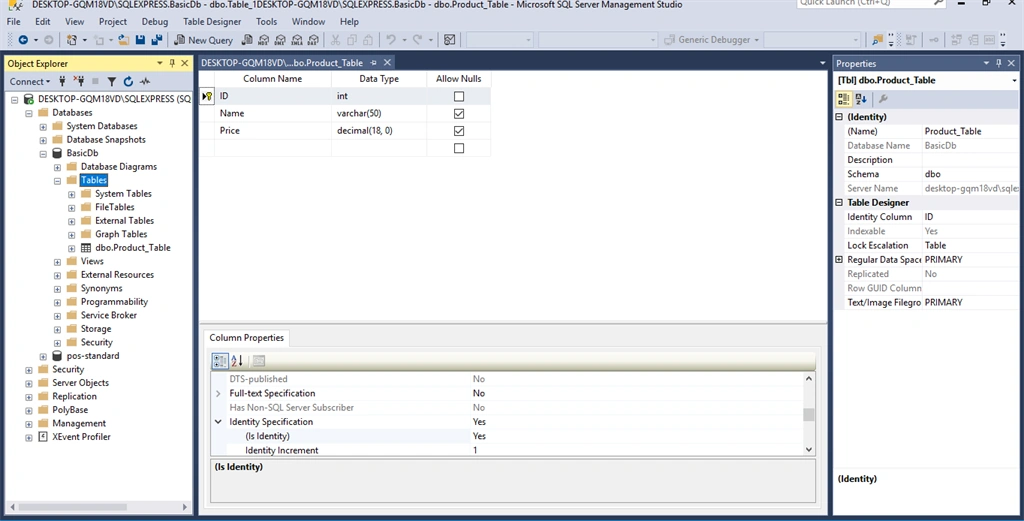
Step 2
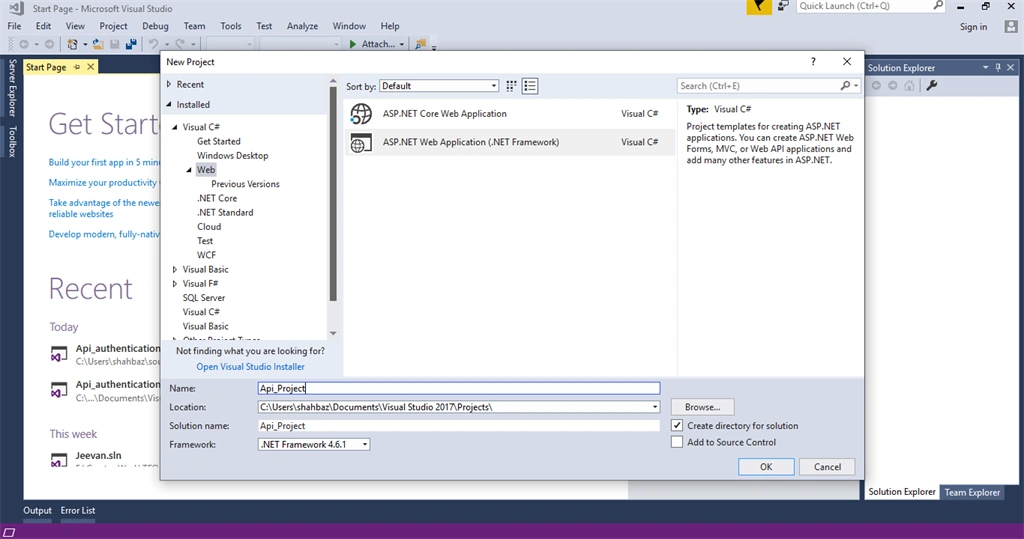
Now, let's create an ASP.NET Project. For this, open Visual Studio and select New > Api_Project.
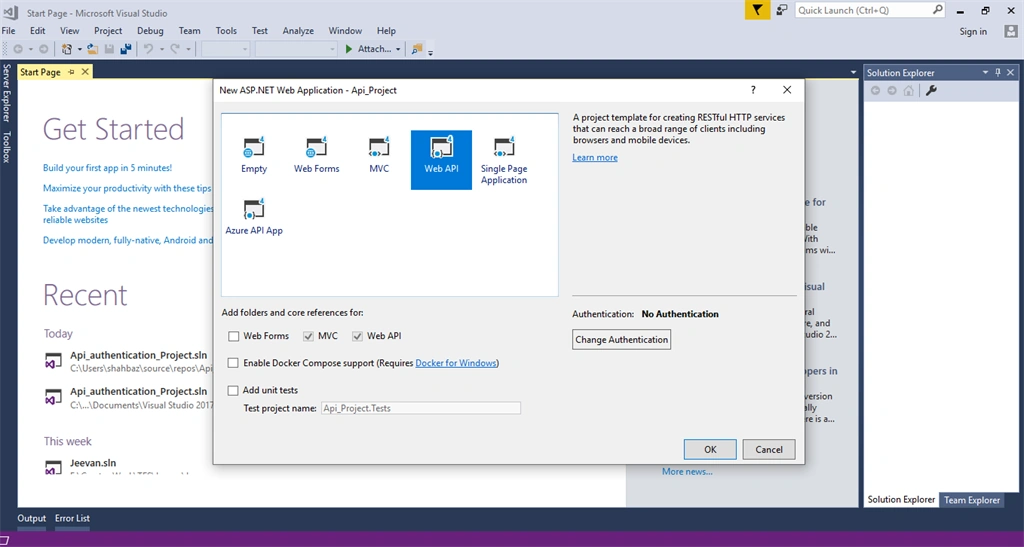
Select Web API Project with No Authentication.
Step 3
Now, create a folder named Authentication.
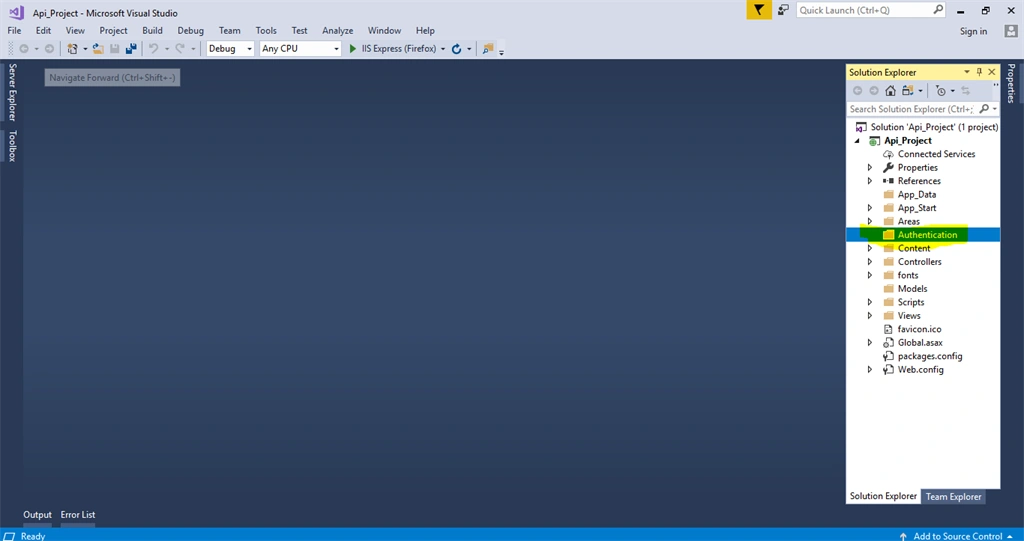
Add a new class in this folder. The class name is BasicAuthentication.
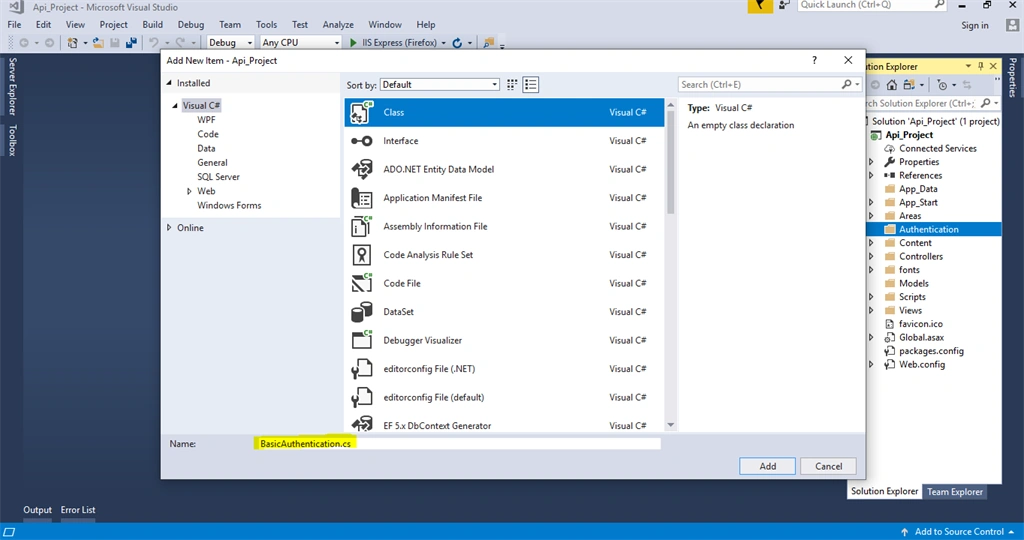
Now, add the following Authorization code to this class.
- using System;
- using System.Collections.Generic;
- using System.Linq;
- using System.Net;
- using System.Net.Http;
- using System.Security.Principal;
- using System.Threading;
- using System.Web;
- using System.Web.Http.Controllers;
- using System.Web.Http.Filters;
- namespace Api_Project.Authentication
- {
- public class BasicAuthentication : AuthorizationFilterAttribute
- {
- public override void OnAuthorization(HttpActionContext actionContext)
- {
- try
- {
- if (actionContext.Request.Headers.Authorization != null)
- {
- //Taking the parameter from the header
- var authToken = actionContext.Request.Headers.Authorization.Parameter;
- //decode the parameter
- var decoAuthToken = System.Text.Encoding.UTF8.GetString(Convert.FromBase64String(authToken));
- //split by colon : and store in variable
- var UserNameAndPassword = decoAuthToken.Split(':');
- //Passing to a function for authorization
- if (IsAuthorizedUser(UserNameAndPassword[0], UserNameAndPassword[1]))
- {
- // setting current principle
- Thread.CurrentPrincipal = new GenericPrincipal(new GenericIdentity(UserNameAndPassword[0]), null);
- }
- else
- {
- actionContext.Response = actionContext.Request.CreateResponse(HttpStatusCode.Unauthorized);
- }
- }
- else
- {
- actionContext.Response = actionContext.Request.CreateResponse(HttpStatusCode.Unauthorized);
- }
- }
- catch (Exception ex)
- {
- ex.Message.ToString();
- }
- }
- public static bool IsAuthorizedUser(string Username, string Password)
- {
- // In this method we can handle our database logic here...
- //Here we have given the hard-coded values
- return Username == "shahbaz" && Password == "abc123";
- }
- }
- }
Step 4
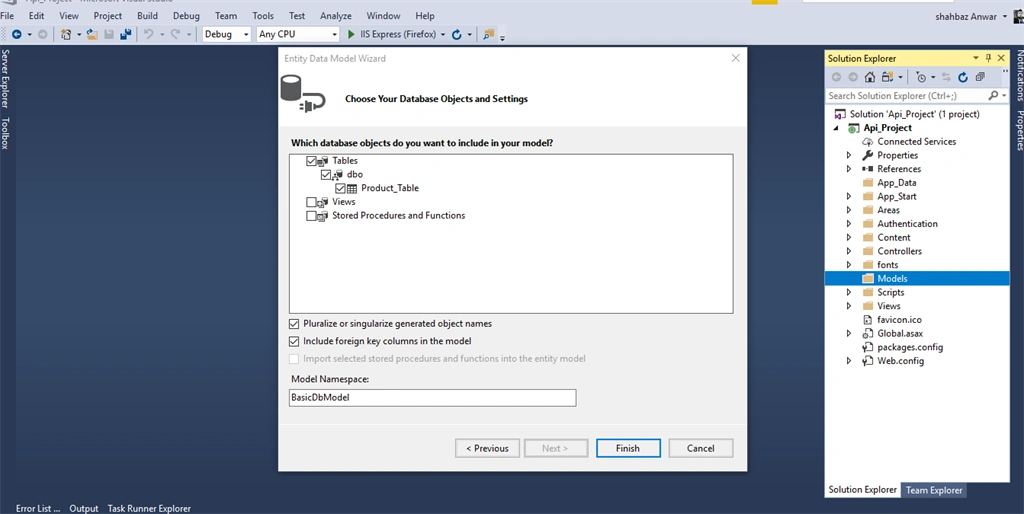
Now, we need to connect our Web API to the database using Entity Framework. Just create a DataContext Model.
Add>New>DataContext.
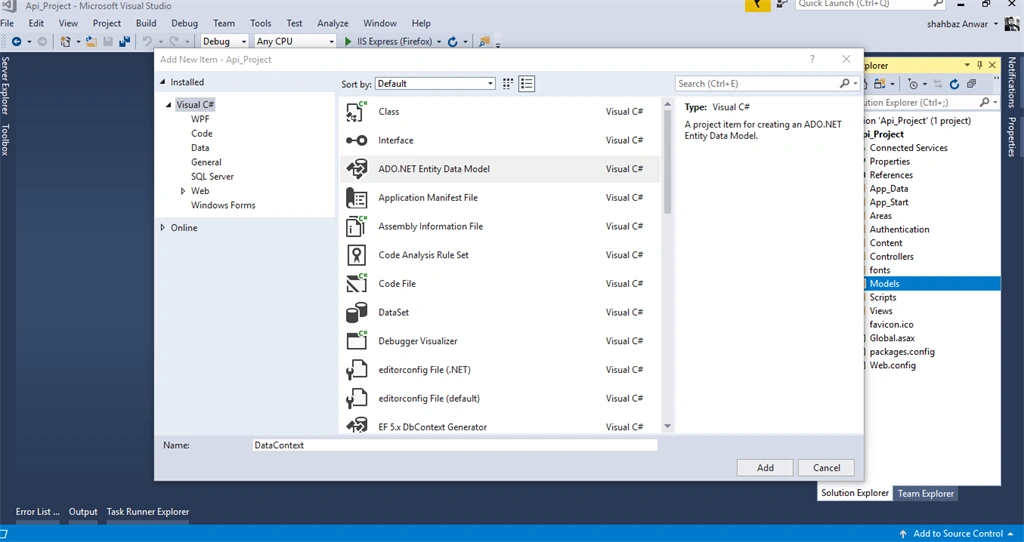
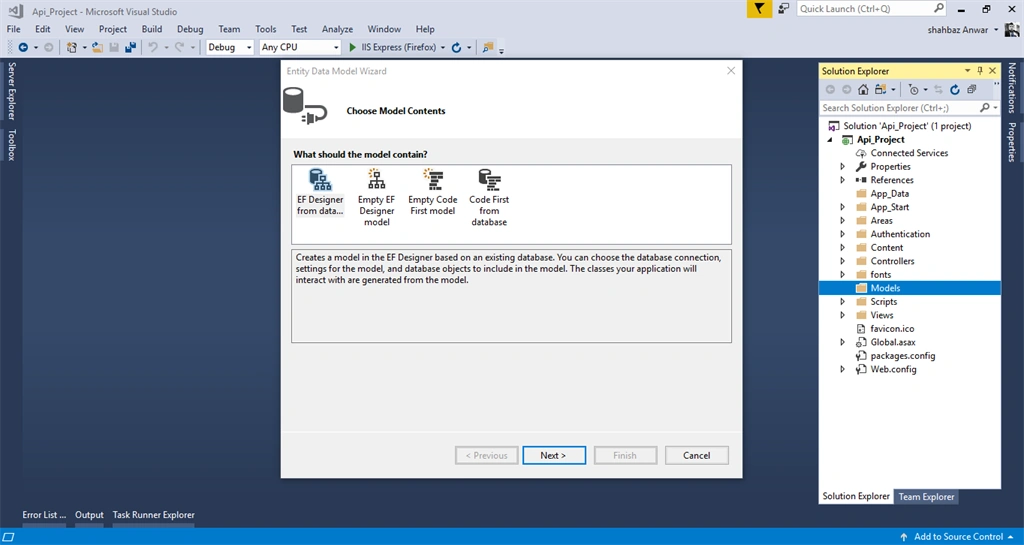
Select EF Designer from the database.
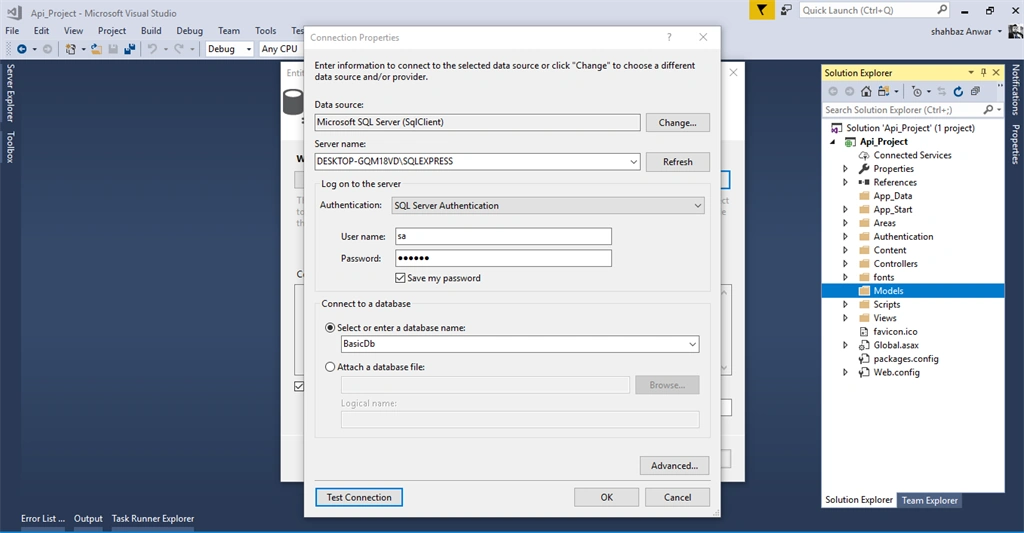
Select the database name on the next screen.
Select the table and click "Finish".
Step 5
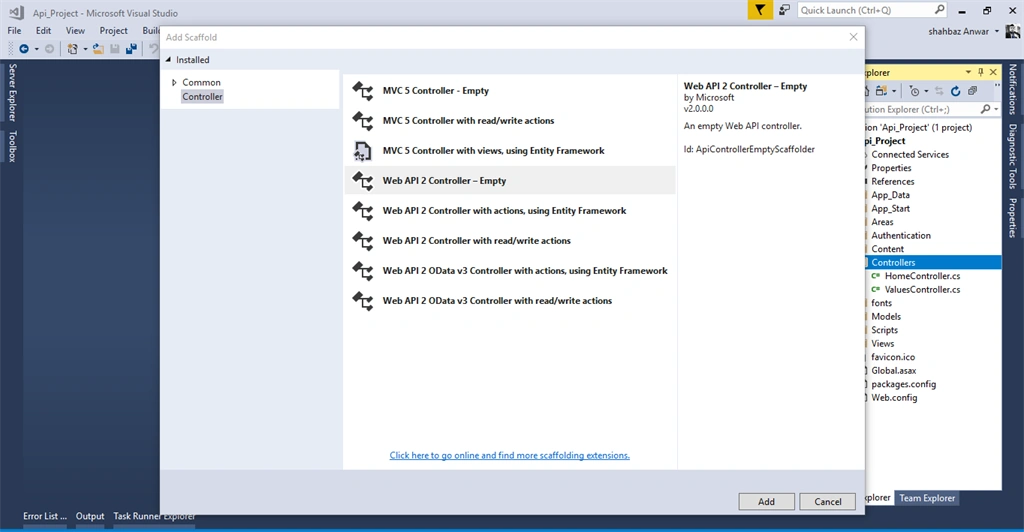
Create a Web API Controller now. For that, go to Add > New > Web API 2 Controller - Empty.
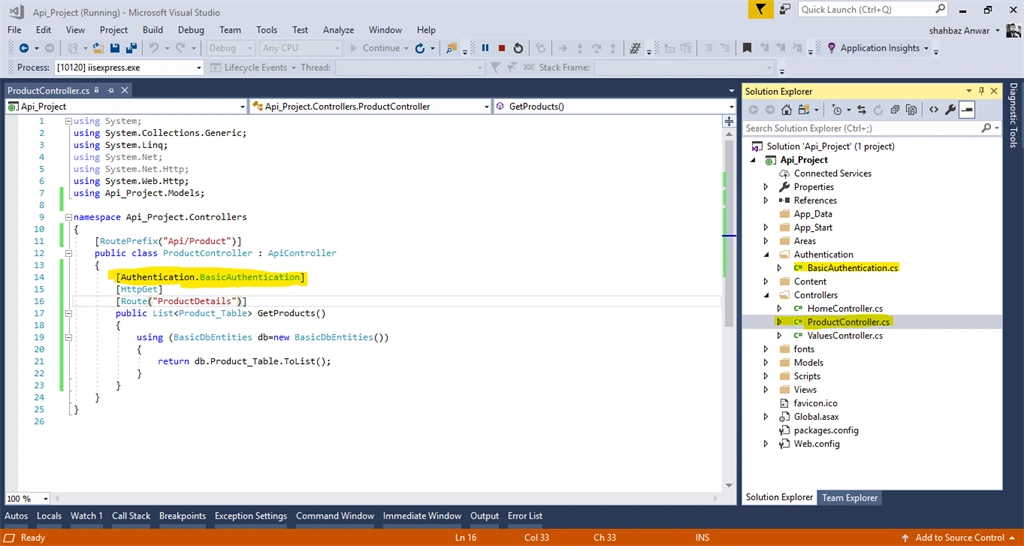
Add this code to the Controller.
- using System;
- using System.Collections.Generic;
- using System.Linq;
- using System.Net;
- using System.Net.Http;
- using System.Web.Http;
- using Api_Project.Models;
- namespace Api_Project.Controllers
- {
- [RoutePrefix("Api/Product")]
- public class ProductController : ApiController
- {
- [Authentication.BasicAuthentication]
- [HttpGet]
- [Route("ProductDetails")]
- public List<Product_Table> GetProducts()
- {
- using (BasicDbEntities db=new BasicDbEntities())
- {
- return db.Product_Table.ToList();
- }
- }
- }
- }
ProductController.cs
Step 6
Now, we will test our Web API using POSTMAN. If you don't have POSTMAN, please download it.
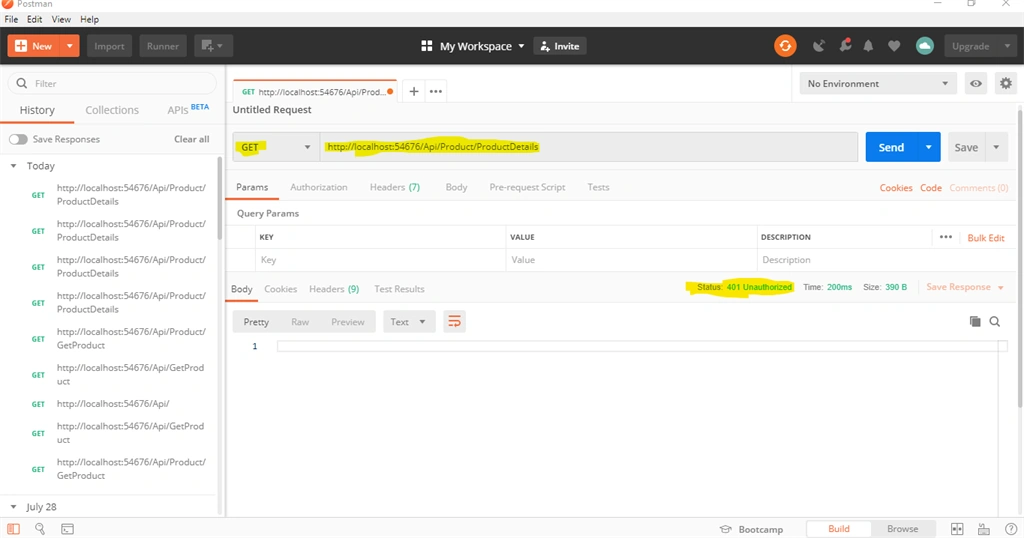
Now, paste the URL and press Enter. Look at the highlighted message (401 Unauthorized) because we didn't pass the credentials. Let's pass the credential Username and password. Given below is the output.
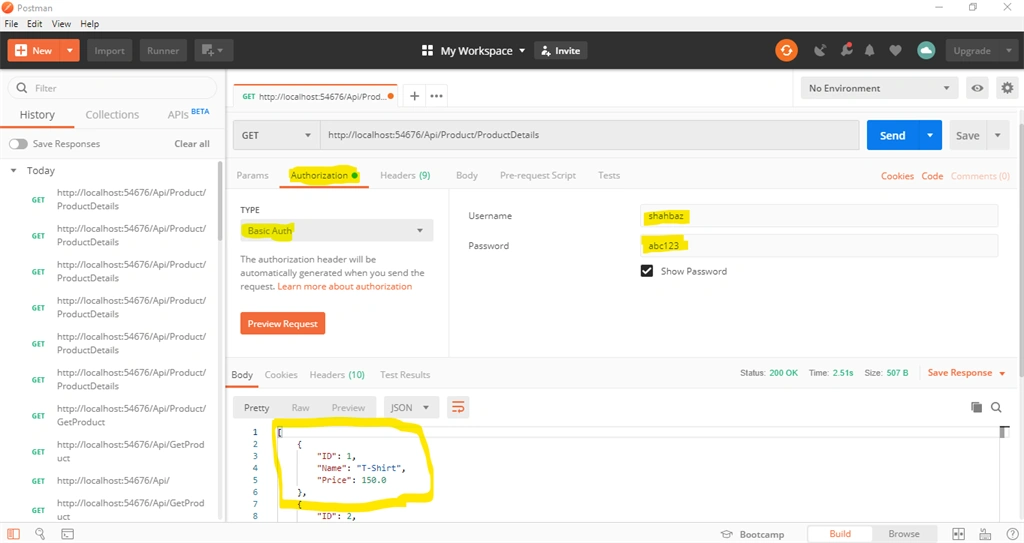
Wow ! We did it successfully. We have returned the data from the database and successfully authorized the credentials.
! We did it successfully. We have returned the data from the database and successfully authorized the credentials.If you find anything wrong in this article or you have a query, please write in the comment section below.
Part 2 and Part 3 will be coming soon.
ignacio cruzPosted Jan 6, 2023, 12:48 AM
Nice tutorial, where are the other two parts? thank you!
Madhei LagsixPosted Jun 28, 2020, 3:01 PM
How can we Authorize any api or controller based on user role ?
Arya ZarandiPosted May 7, 2020, 11:56 AM
Hi Thanks for This Article. How Can Authorize users with this Article? Can You Help Me? Thanks
Nguyen Duc Ngoc HoangPosted Dec 17, 2019, 3:48 AM
Thank u so much
Joseph RozarioPosted Dec 7, 2019, 11:04 PM
Its really helpful.
Shahbaz HussainPosted Sep 1, 2019, 1:45 PM
Https://www.c-sharpcorner.com/article/angular-8-crud-with-oauth2-0-in-webapi-part-2/
Shahbaz HussainPosted Sep 1, 2019, 1:45 PM
Https://www.c-sharpcorner.com/article/angular-8-crud-with-oauth2-0-in-webapi-part-1/
sayed fouadPosted Sep 1, 2019, 3:17 AM
Very good wait to the next articlr
sayed fouadPosted Sep 1, 2019, 3:17 AM
Very good wait to the next articlr
Amit MohantyPosted Aug 7, 2019, 7:32 AM
Nice article