

You'll start off by creating a new Silverlight Application project in Visual Studio 2008:
Notice that in the main Grid there is only one UI FrameWork element, and that is a Button control with the x: Name of myButton. That's it you have successfully created the Button Control Template, try playing with it more. Enjoy Designing.
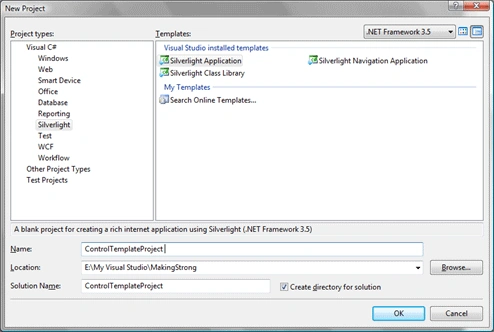
Figure 1-1. Creating a new Silverlight Application project called ControlTemplateProject in Visual Studio 2008
In this project, you are going to create a ControlTemplate for a Silverlight Button control. You are then going to create a few Silverlight Buttons and apply your new ControlTemplate to them to see how simple it is to reuse a ControlTemplate resource. So start by opening your new project in both Visual Studio 2008 as well as Blend.
Now you should have your project open in both Visual Studio 2008 and Blend 3. As you probably know by now, this is the typical workflow for me, as I like to do my design work in Blend 3 and then use Visual Studio to create my functionality (EventHandlers, etc.). With that in mind, you'll use Blend 3 to design your new Button ControlTemplate.
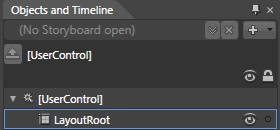
Figure 1-2 Selecting [UserControl] in the Objects and Timeline panel
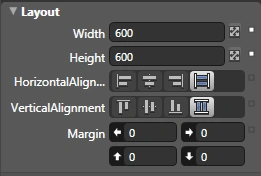
Figure 1-3. Changing the Width and Height settings to 600
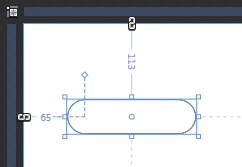
Figure 1-4. Using the radius handles to give the Rectangle rounded edges
Now you have the basis for what will be your Button control. But it does look a little simple, does it not? Go ahead and give it a quick gradient.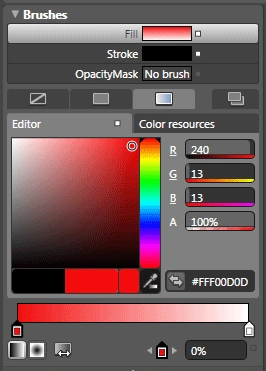
Figure 1-5. Giving your Rectangle a Gradient brush fills in the Brushes section of the Properties panel
Go ahead and play with the gradient fill colors as well as the Brush Transformation tool until you have something you are pleased with or something like I have done, as shown in Figure 1-6.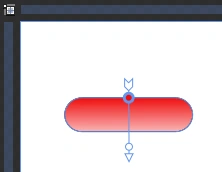
Figure 1-6. I created this gradient fill by adjusting the colors in the Brushes section of the Properties panel and by adjusting the gradient with the Brush Transformation tool
Now that you have a Rectangle that you are happy with, you need to tell Blend that you want to use this as a ControlTemplate for a Button. The easiest way to do this is by using Blend's Make a Button feature as follows:
Now let's see what Blend 3 has done for you. The first thing to notice is that the Rectangle now has letters over it that read "Button" (see Figure 1-7).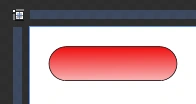
Figure 1-7. When you turn your Rectangle into a Buttoncontrol, Blend places text over your Rectangle.
What Blend also did was turn the Rectangle in the Objects and Timeline panel into a Button control (see Figure 1-8)-very cool!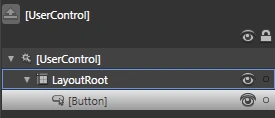
Figure 1-8. Blend turns your Rectangle into a Button control.
So now, the newly created Button control, formerly a Rectangle, has all of the capabilities of a normal Silverlight Button control, but the difference is that instead of using Silverlight's basic ButtonControlTemplate, it uses yours. Pretty cool, huh? You'll give your new Button a little functionality to prove it is just like any other Silverlight standard Button control, but before you do, I think it would be good to delve into the XAML and see exactly what Blend 3 did for you "under the hood," so to speak.
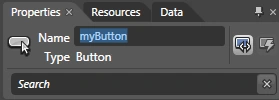
Figure 1-9. Naming your Button control in the Name section of the Properties panel
<UserControl
xmlns="http://schemas.microsoft.com/winfx/2006/xaml/presentation"
xmlns:x="http://schemas.microsoft.com/winfx/2006/xaml"
xmlns:vsm="clr-namespace:System.Windows;assembly=System.Windows" x:Class="ControlTemplateProject.MainPage"
Width="600" Height="600">
<UserControl.Resources>
<Style x:Key="RedButtonControl" TargetType="Button">
<Setter Property="Template">
<Setter.Value>
<ControlTemplate TargetType="Button">
<Grid>
<vsm:VisualStateManager.VisualStateGroups>
<vsm:VisualStateGroup x:Name="CommonStates">
<vsm:VisualState x:Name="MouseOver"/>
<vsm:VisualState x:Name="Normal"/>
<vsm:VisualState x:Name="Pressed"/>
<vsm:VisualState x:Name="Disabled"/>
</vsm:VisualStateGroup>
<vsm:VisualStateGroup x:Name="FocusStates">
<vsm:VisualState x:Name="Unfocused"/>
<vsm:VisualState x:Name="Focused"/>
</vsm:VisualStateGroup>
</vsm:VisualStateManager.VisualStateGroups>
<Rectangle Stroke="#FF000000" RadiusX="26" RadiusY="26">
<Rectangle.Fill>
<LinearGradientBrush EndPoint="0.502,1.441" StartPoint="0.5,0">
<GradientStop Color="#FFF00D0D"/>
<GradientStop Color="#FFFFFFFF" Offset="1"/>
</LinearGradientBrush>
</Rectangle.Fill>
</Rectangle>
<ContentPresenter HorizontalAlignment="{TemplateBinding HorizontalContentAlignment}" VerticalAlignment="{TemplateBinding VerticalContentAlignment}"/>
</Grid>
</ControlTemplate>
</Setter.Value>
</Setter>
</Style>
</UserControl.Resources>
<Grid x:Name="LayoutRoot" Background="White">
<Button x:Name="myButton" Height="52" HorizontalAlignment="Left" Margin="28,29,0,0" Style="{StaticResource RedButtonControl}" VerticalAlignment="Top" Width="193" Content="Button"/>
</Grid>
</UserControl>
Let's break down exactly what Blend 3 did:
-> A Grid
-> A Rectangle
-> A Rectangle.Fill
-> A ContentPresenter (this is the text that reads "Button")
-> ControlTemplate.Triggers to define how interaction is handled
Button Control Template In Silverlight 3
Using Blend 3 Creating Button Control Template in Silverlight 3
Join the conversation! Your thoughts help the community grow.
Sign in to leave a comment
It is the same account you read, post and publish with — and you will come straight back to this page.
danny drorPosted Nov 11, 2009, 4:51 AM
thanks for sharing the core, its quite helpful :) ---------------------------- Danny, Locksmith Los Angeles
praval singhPosted Sep 26, 2009, 3:52 AM
Hi , I am try to fill data form with records but it gives me error that dataform does not supprt datafield direct content so , plz help praval