

Before reading this article, please read the previous articles so that you can understand Azure DevOps. The list of previous articles is provided below.
- What Is New In Azure DevOps
- How To Add .NET Project Into Azure DevOps Git Repo
- An Overview Of Artifacts In Azure DevOps
- How To Clone An Existing Git Repo In Azure Repos
- Create And Manage Windows Virtual Machine In The Azure Portal
- Step By Step Setup IIS On Azure Windows Virtual Machine
In my previous article, we saw what Continuous Integration is and how to set up Azure DevOps Pipelines for CI in a .NET project.
This article is an extension to my previous article on Continuous Integration using Azure DevOps Pipelines and the .NET Project. For those who are new to this, I request you read my previous article on CI.
So, let's see how to set and build a pipeline for continuous deployment.
Step 1. Pipeline
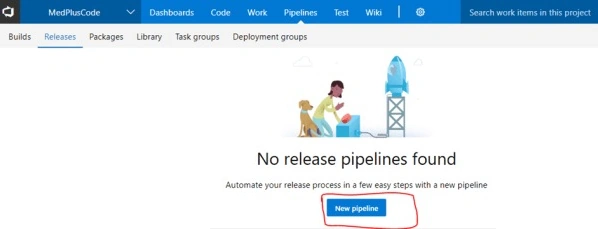
- Log into your Azure DevOps account and choose Pipeline Releases. If it is your first time, you can also select the "New Pipeline" button as shown in the below screen.
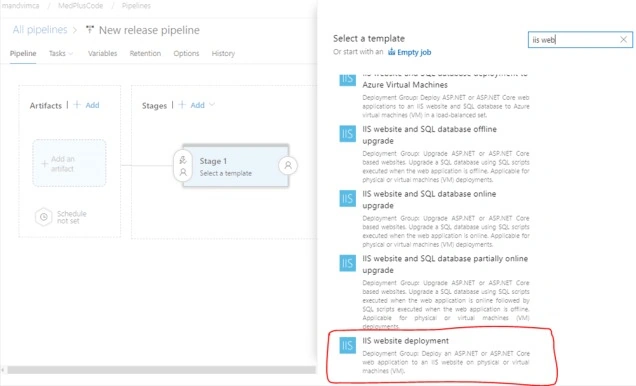
- On the Template selection screen, search for IIS Web and select IIS Website Deployment. As we have a .NET web application to be deployed, I have selected IIS Website Deployment here.
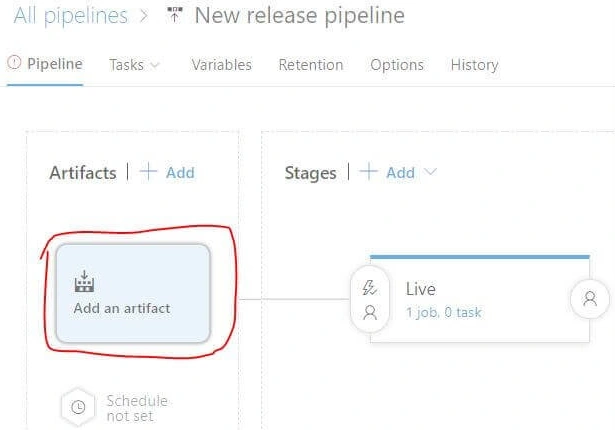
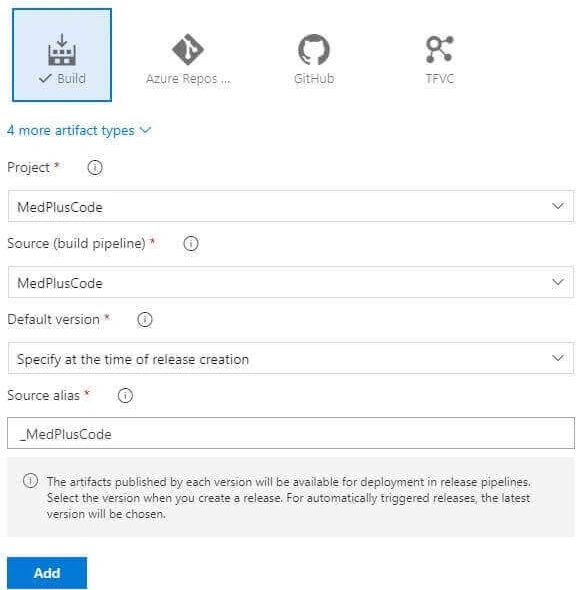
- Now, we have to set up artifacts and stages for the deployment, so click on "Add an artifact", as shown in the below screen.
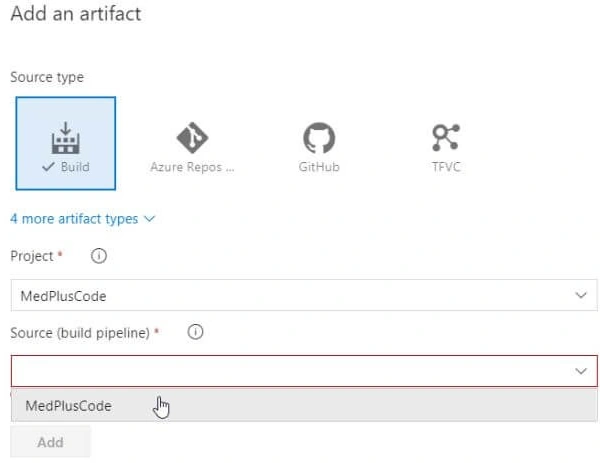
- In our ContinuousIntegration section, we have already set up the Build for the deployment. Just select 'build' as a Source Type, select the project name and source build from the list, and click on 'Add'.
There are three ways we can schedule the release trigger
- On a specific date time or day
- Start when any check-in happens
- Manual trigger.
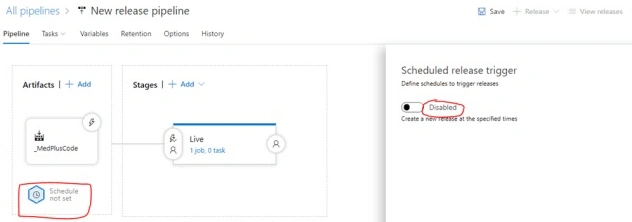
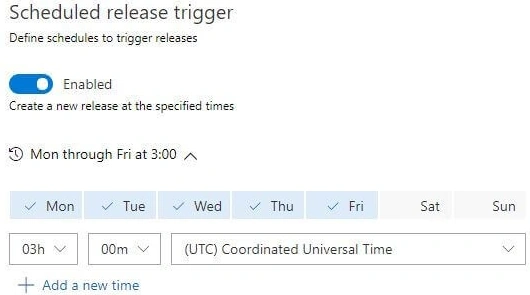
- Select the scheduler, enable the trigger, and if you want to set a specific day and time, just set up by providing timings.
Step 2. Tasks
As we have selected the IIS Deployment template, there are a few tasks and configurations to be done, as mentioned below.
- IIS Deployment
- IIS Web App Manage
- IIS Web App Deploy
Let's understand and configure one by one.
IIS Deployment
- You have to specify the name for this deployment group job and configure the deployment group first. A deployment group is a logical set of deployment target machines that have agents installed on each one.
- It represents the physical environments, like 'Dev', 'Staging', or 'Production' etc.
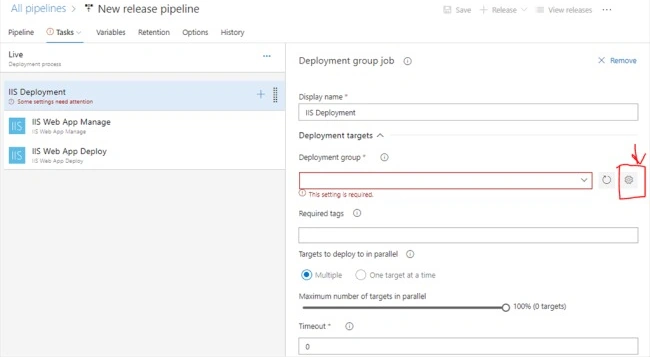
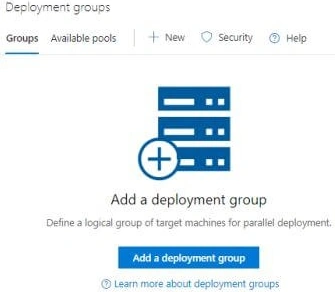
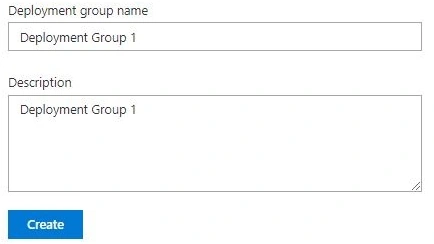
- To create a new deployment group, just click on "Add deployment group", enter the name as well as the description, and click "Create".
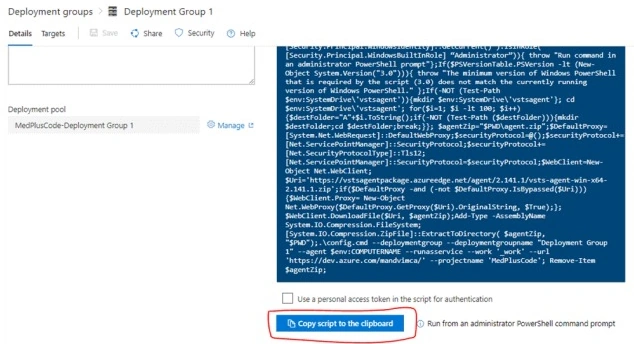
- It will generate a script to run on your virtual machine's PowerShell. To configure that system, click on "Use a personal access token in the script for authentication" and click on 'Copy script to the clipboard'.
- Now, log into your virtual machine and run PowerShell from the Start menu.
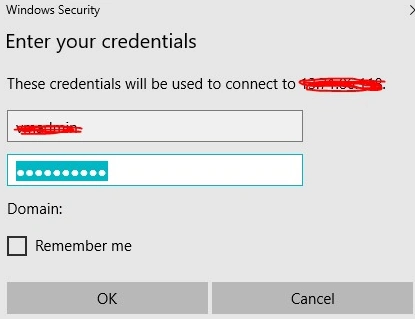
- Paste the script and press Enter.
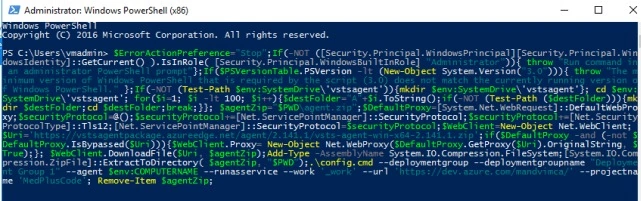
- It will ask for the "Deployment agent" selection; press Enter and wait for the next prompt.
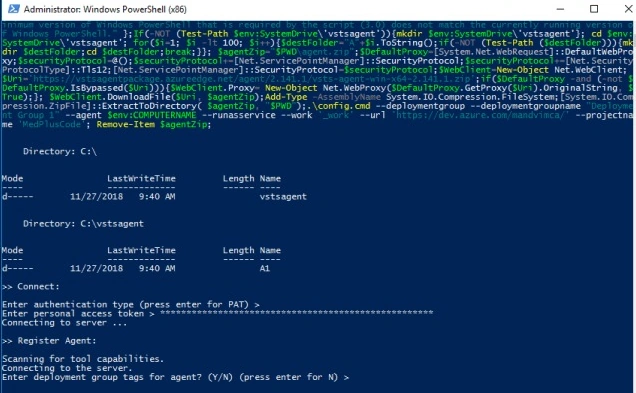
- It will prompt you to choose the account to use the services. Press Enter and wait for the Deployment Group activation.
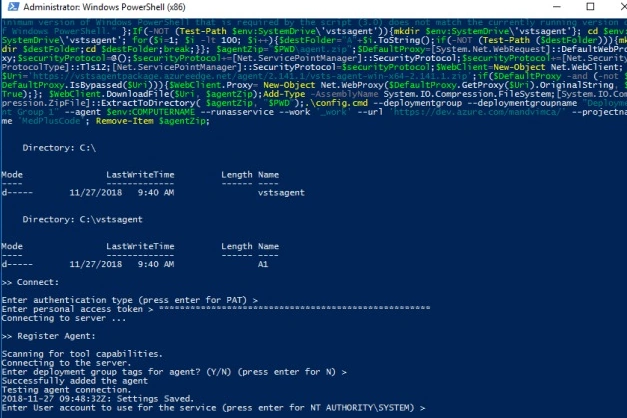
- That's it. Your Deployment Group is up and running, you can see the Target status online.

- Save the changes and move on to the next tab.
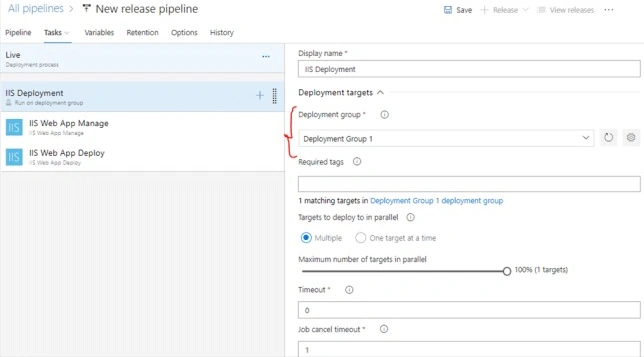
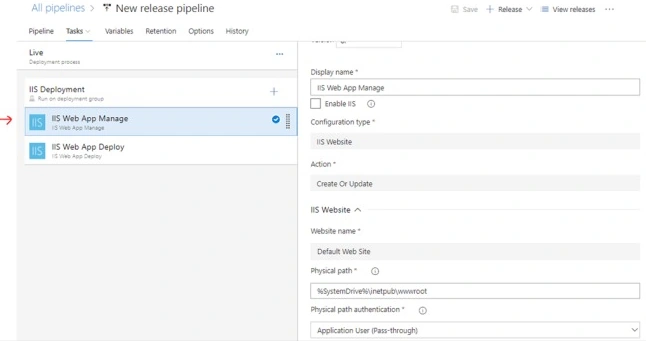
IIS Web App Manage
- Here, we have to configure the web app details, like the website name or a physical path for the web application folder.
- My default website physical path was C:\inetpub\wwwroot. This, we have to mention in the physical path text box.
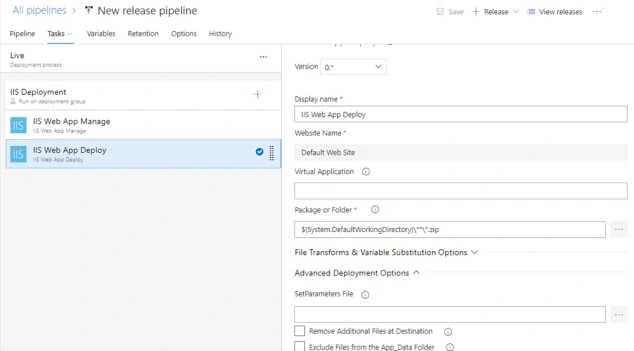
IIS Web App Deploy
- In the last tab, we have to specify the package or folder details. That means from the Continuous Integration, whatever the latest package or zip files we get, we have to provide that so that the agent copies the files and deploys those to the specific location.
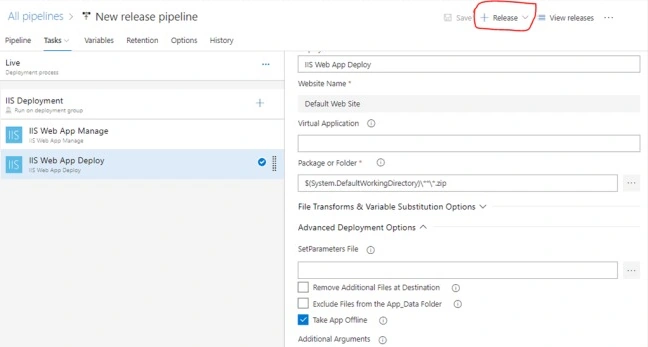
- Once this is done, we can create the release manually for testing and test the deployment.
Step 3. Variables Setup
Variables give us a convenient way to get the key data into various parts of the pipeline. There are system predefined variables and you can also create user-defined variables as per your need. For more details,click here.

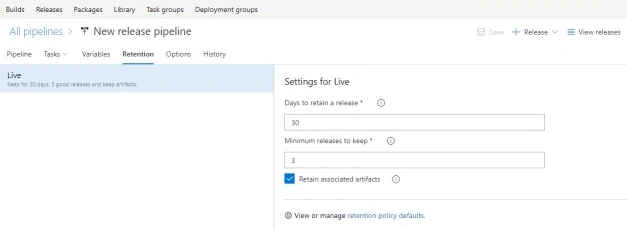
Step 4. Retention Policy
The Retention Policy will help you to keep the history of your last few releases. You can configure the days here.
Step 5. Release Naming
The following are the options we can use for managing the release name format.
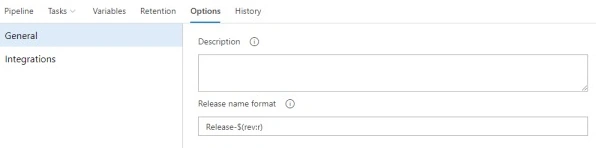
Step 6. Release and Deployment
- Release and deployment: To start the manual release, click on "Create release".
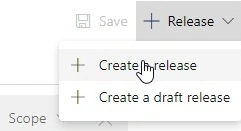
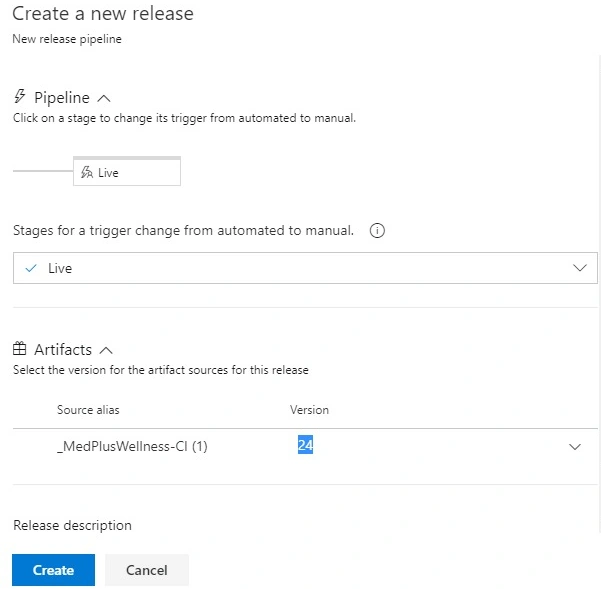
- Select the state in which you want to deploy. Here, I have selected the live one.
- Next, select the artifacts and version number you want to deploy and click "Create".
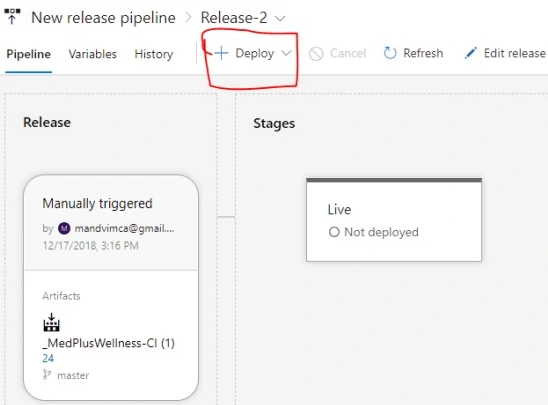
- Your release pipeline is ready. Test it by deploying it manually. Click on "Deploy" and wait for the deploy release tasks to be executed.
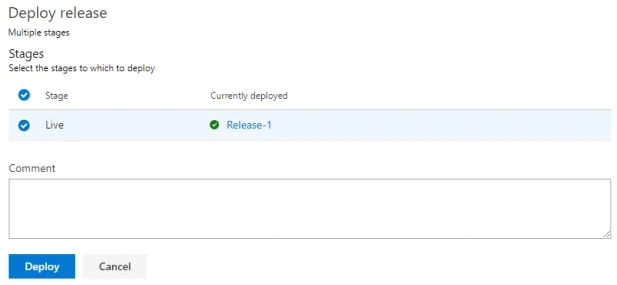
- You can see the logs of all the task activities by clicking on "Status".
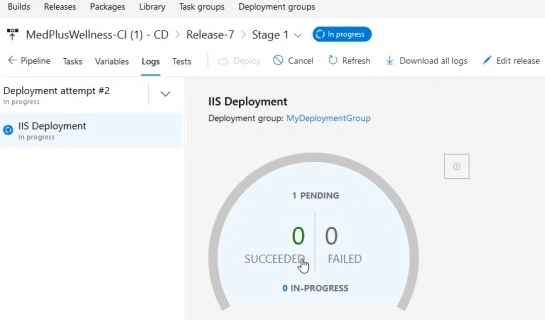
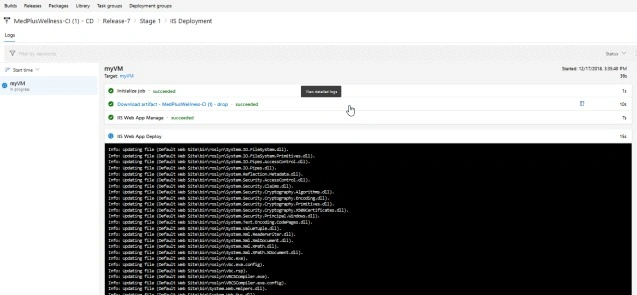
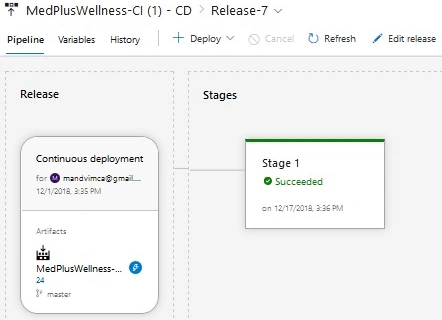
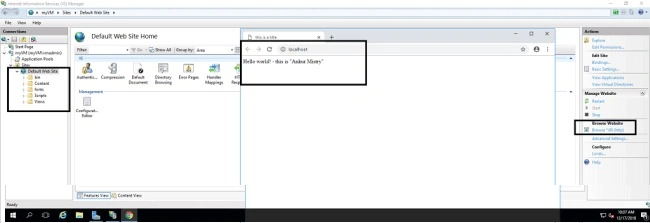
- Once it's succeeded, you can see all the changes live on the default website on Azure Virtual Machine.
- I have already created the Azure VM and set up IIS for web application deployment. You can also create one and for details, you can refer to my article"Create And Manage Windows Virtual Machine On Azure Portal".
- To host a website, we need IIS on Windows Virtual Machine and you can set up IIS on your virtual machine by following these steps here.
- So here, I have hosted my web app on the default website that is hosted on the port 80 (default port) of IIS. Whenever we deploy, we can check the web pages by clicking on the "Browse website" option as shown in the below screen
History
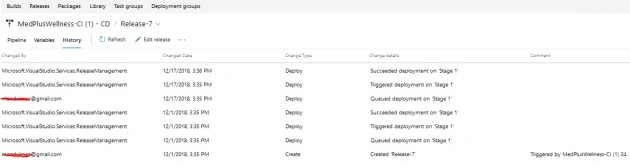
After the deployment, you can view the history of the changeset, change type, comment, Date time, User, and change details, anytime you want.
I hope you like this article. I'm waiting for your feedback or comments in the comment box.
If you want to read more about Azure DevOps, the next articles in this series are listed below.
guru chiragPosted Jul 25, 2020, 1:53 AM
I have followed all thee steps. but ddeployment is not happening properly. i can see all the cs files in ASPX folder and there is no precompiledapp config file in target folder. kindly help me .
Mahesh AllePosted Dec 30, 2019, 6:26 AM
Excellent once. It is very help full. Also can you please help me how to do the same thing with Angular project. I stuck in deployment of the angular project using deployment groups. I am not getting which template I need to choose for angular deployment in new release pipeline. Any help will be really appreciated.
Rushi MehtaPosted May 1, 2019, 11:15 PM
Great article written Ankur, Thanks for sharing this wonderful article.
kravi kothakondaPosted Mar 8, 2019, 12:10 AM
Great article Put some previous and Next Article Link
Jay APosted Jan 21, 2019, 7:38 AM
Great article. Any article on how to get an Angular+.Net Core app into Azure DevOps VM?
Ankur MistryPosted Dec 21, 2018, 10:34 PM
Special thanks to balakrishna maddhur & Darshana for correction
Mahesh ChandPosted Dec 21, 2018, 11:45 AM
Great work Ankur. Very detailed. Also nice to see someone using Title emojis feature :)