

For creating a user defined control we need to do the following tasks:
Open Visual Studio 2005 or whichever version you are using.
Click on File Menu - >New - >Project - >Windows control Library.
Provide a Name to user control as ImageViewer in the Name box - > Click ok.
And your window control library form is opened.
Now set the following properties of your form.
Name=ViewImage
Auto Size =true;
Auto Scroll =true;
Now take a split container from the tool box and align to horizontal.
In the 1st panel add a picturebox control and set the dock property to fill and set the sizeMode property to Zoom.
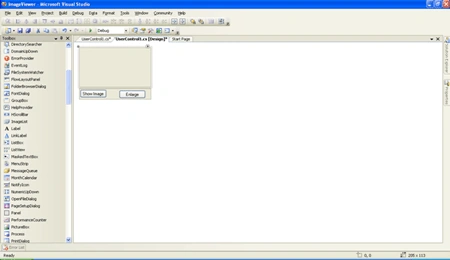
In the 2nd panel add 2 button controls as Show Image and Enlarge as the text property.
Your form should look like this.
Now we just need to do the code part:
using System;
using System.Collections.Generic;
using System.ComponentModel;
using System.Drawing;
using System.Data;
using System.Text;
using System.Windows.Forms;
namespace ImageViewer
{
public partial class ViewImage : UserControl
{
//static variables so that it can hold there values
//even after the function to which it belongs has been executed
private static string name, path;
private static int width, height;
public string ImageName
{
get
{
return name;
}
set
{
name = value;
}
}
public string ImagePath
{
get
{
return path;
}
set
{
path = value;
}
}
public int ImageWidth
{
get
{
return width;
}
set
{
width = value;
}
}
public int ImageHeight
{
get
{
return height;
}
set
{
height = value;
}
}
public ViewImage()
{
InitializeComponent();
}
private void ViewImage_Load(object sender, EventArgs e)
{
pictureBox1.SizeMode = PictureBoxSizeMode.Zoom;
}
private void button1_Click(object sender, EventArgs e)
{
if (ImagePath != "" || ImagePath != null)
{
pictureBox1.ImageLocation = ImagePath;
pictureBox1.Width = ImageWidth;
pictureBox1.Height = ImageHeight;
}
}
private void button2_Click(object sender, EventArgs e)
{
pictureBox1.SizeMode = PictureBoxSizeMode.AutoSize;
}
}
}
Our ImageViewer Control is ready now for use. Now we just need to test its functionality.
Open a new instance of Visual Studio and select a Windows Application from the file menu.
Now we need to add the reference of the user defined control in our Windows application.
You can do this by following the following steps:
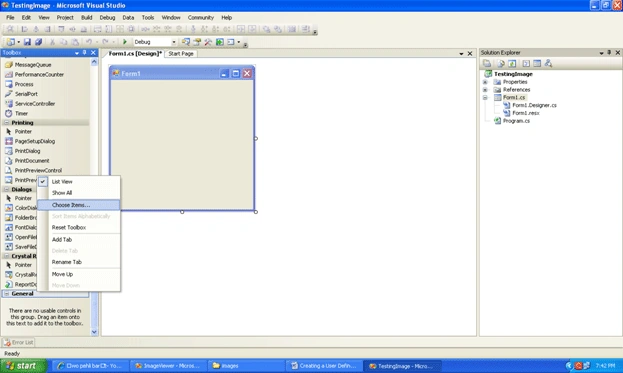
Right-click on the toolbox on any category and select choose Items from the menu.
A choose Item Dialog box appears:
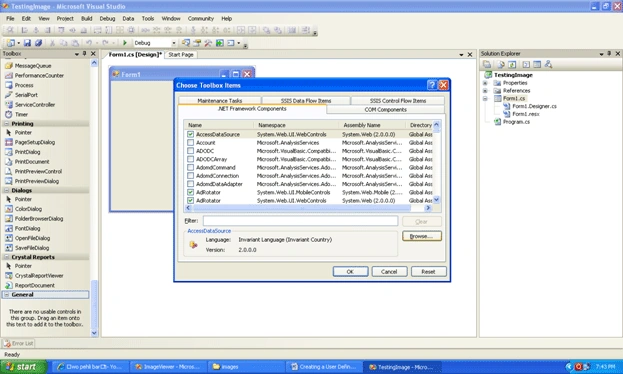
Click on the browse button and go to the desired path where you have created your user defined control; select the dll file which is there in the obj/debug/ImageViewer.dll. and click open. Your control will be added to the choose toolbox items dialog box -> ok Button.
Now your control will be added in the toolbox. Just drag and drop the control onto the form; we just do that for the .Net controls.
using System;
using System.Collections.Generic;
using System.ComponentModel;
using System.Data;
using System.Drawing;
using System.Text;
using System.Windows.Forms;
using ImageViewer;
namespace TestingImageViewer
{
public partial class Form1 : Form
{
ViewImage obj = new ViewImage();
public Form1()
{
InitializeComponent();
}
private void Form1_Load(object sender, EventArgs e)
{
obj.ImageName = "Human Face";
obj.ImagePath="C:\\Documents and Settings\\Administrator\\Desktop\\images\\images2.jpg";
obj.ImageWidth = 100;
obj.ImageHeight = 100;
}
}
}
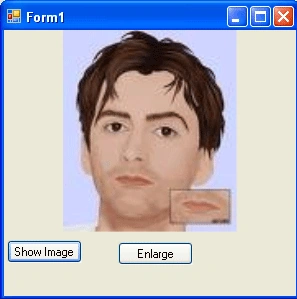
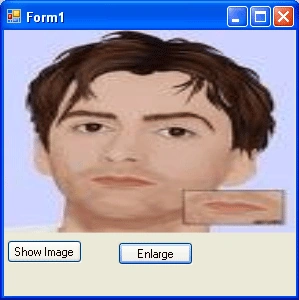
The following should be the output:
Hope you enjoyed the article.
Anil KumarPosted Jul 28, 2011, 2:09 AM
Good one
Angelina ErinPosted Jul 28, 2011, 12:08 AM
Interesting article
LanaPosted Jul 27, 2011, 2:29 PM
good explaination,thanks