
In this article, you’re going to learn how to host your web app using Azure and how to update it using staging slot and GitHub as external repository.
Prerequisites
- Azure Account
- GitHub Account
Create Azure web app
STEP 1
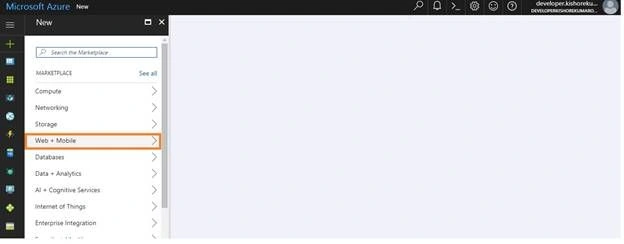
Once you’re on the Azure portal, locate the sandwich menu (three horizontal lines) at the left side corner. Clicking on it, a "New" blade will open where you have multiple options. Click Web+ Mobile.
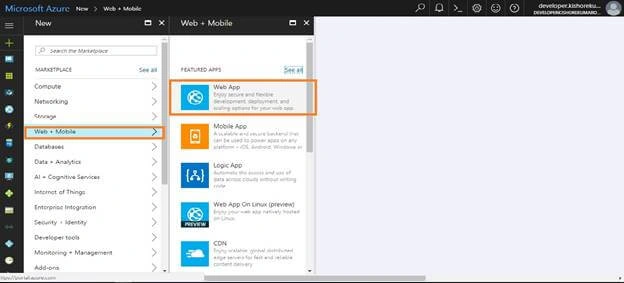
In the next blade, you will find the Web App option. Click on it to create a new web app.
STEP 2
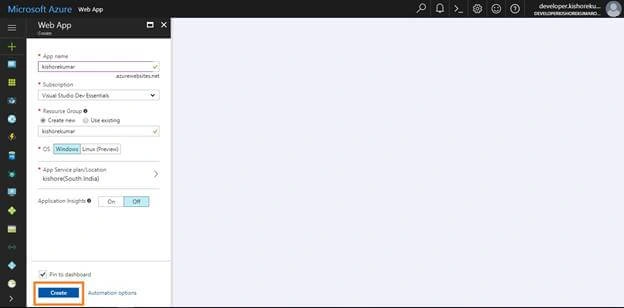
Now, you have multiple options, like Name, Subscription, Resource group etc.
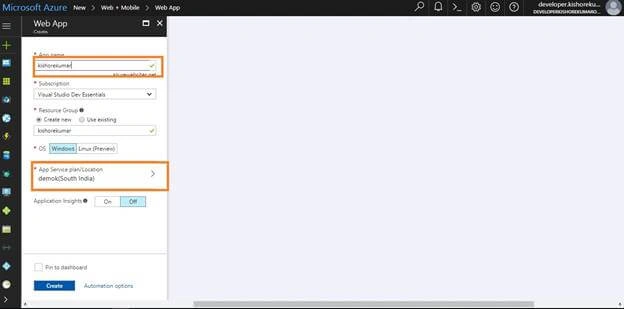
- Name will be your Web App name
- Subscription is the environment that you purchase as per your requirement (if you are creating a free trial account, you will have your subscription as trial subscription and if you’re going to be a new start-up firm, you will have your subscription as bitspark. Likewise, there are different types of subscription as per your required environment.
- Resource group can be considered as a virtual container where you can place all your resources in one place for easy access (if you’re working on a project which has Web App, Virtual Machine, and Storage etc. as its resources, you can place all these resources in one resource group by either creating a new resource group or choosing an existing one). This helps you to manage all your resources in one place and you can also pin them too.
- OS - As per your requirement for the web app, you can choose Windows or Linux as your platform.
- App Service Plan is all about the requirements of your app. There are five different types of App Service plan - Free, Basic, Standard, and Premium. As per your requirement, you can choose the plan that suits your need. As of now, we will be using Standard Service Plan so, that we could use staging slots for updating websites.
- Application Insight gives you the insight matrix of your Web App usage and page hit-miss status etc.
Create New App Service Plan
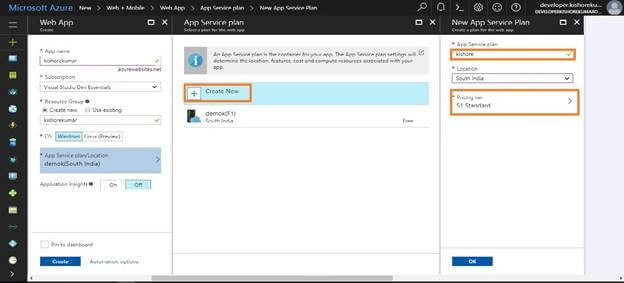
- App Service plan helps to maintain one single plan for all your web apps and mobile apps. The Free plan gives you a total of cost shared resources for your web app; Shared plan allows you to add a custom domain to your web app in a shared environment; Basic, Standard, Premium plans provides dedicated virtual machines to your webApp. You can host multiple apps and domains in each instance you deploy within your created plan.
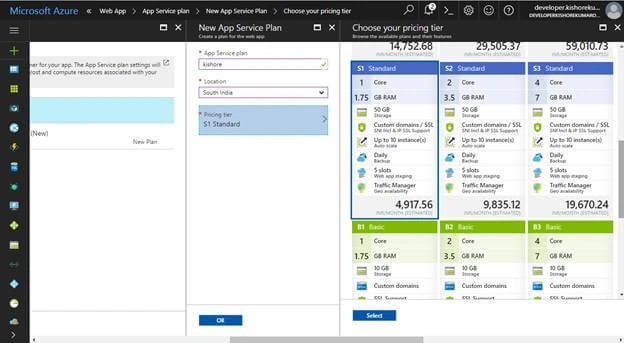
- Location defines the physical location where your web app will be deployed. Let’s choose South India.
- Select appropriate pricing tier as per your requirement. I’m going to choose S1 standard.
Select "Create" to deploy the app.
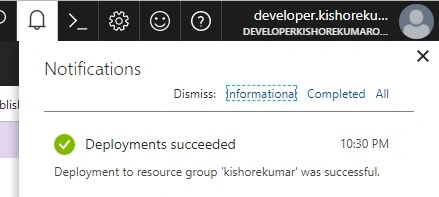
When the web app is created, you will get a notification in the Notification Panel.
STEP 3
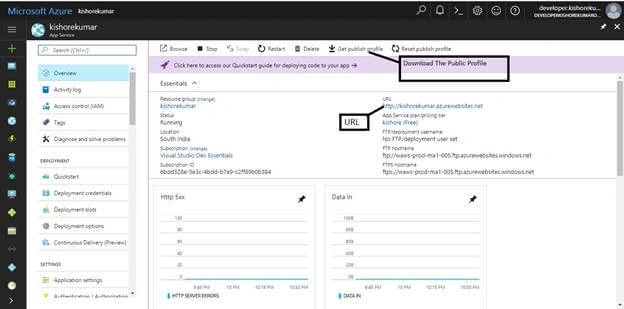
In the overview of your web app, you can see various options such as Browse, Stop, Swap, Get Public Profile, Reset Public Profile etc. Click on "Get public profile" to download your web app profile.
Step 4
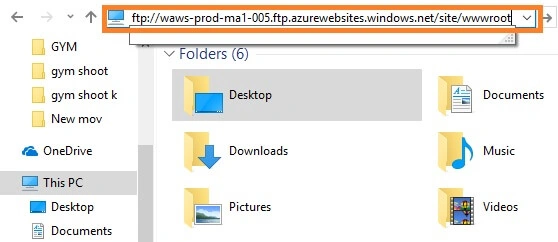
Open the downloaded profile in notepad where you can find your FTP URL. Paste it in the "File Explorer" as shown in the above screenshot.
Now, you will be prompted to enter your username and password. Copy the Username and Password from the downloaded Public Profile to login to your Application File System.
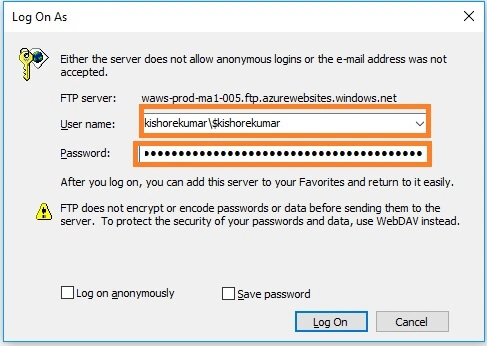
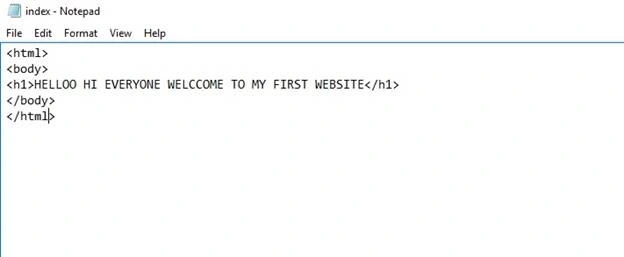
We will create a basic HTML page and save it as index.html using Notepad.
Copy the created index.html and paste it in the root folder.
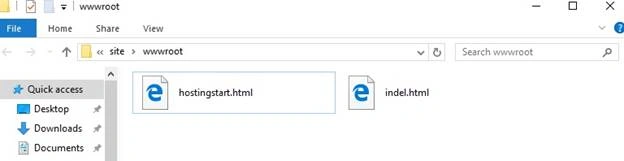
To check if your web app has been published, go to your Web App Overview in the Azure portal and click on "Browse". This will take you to your website.

Now, our web app has been hosted successfully. Let’s create a Deployment Slot for updating our website.
To create Deployment Slot, we will head over to our web app. In the Web App blade, you can find the Deployment Slot option, click on it. In the new window, click on "Add Slot" to create a new slot.
Deployment Slot
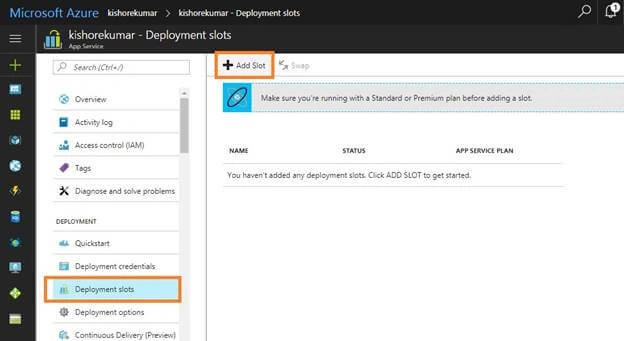
Slot Name
In the new window, you will find some details to be filled out to create a new Deployment Slot.
- Name - this would be your Deployment Slot name.
- Configuration Source - there are two options. One which will create blank website under the production website and the other option wil be cloning your production website.
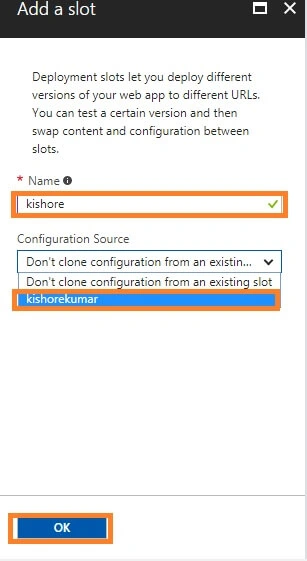
Once you click OK, your Deployment Slot will be created.
To find your newly created deployment slot, go to Resource Group and find your specific resource group that you created for your web app. Here, you can find your new web app.
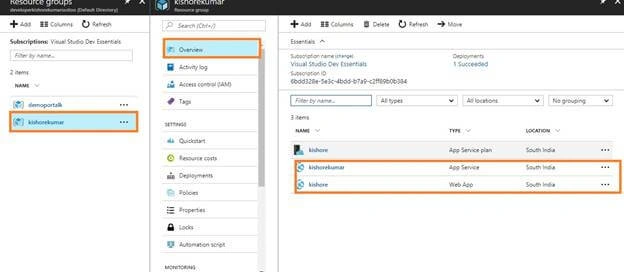
Go to the Deployment option in your staging slot web app (kishorekumar in my case) to add your website content through GitHub. For swapping process.
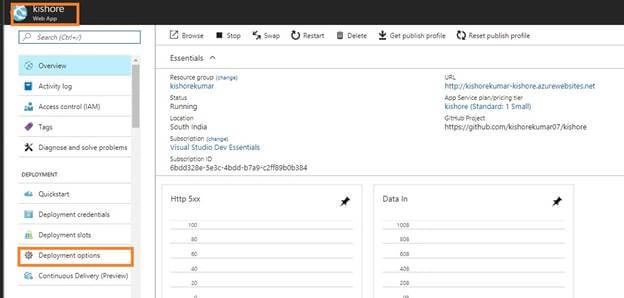
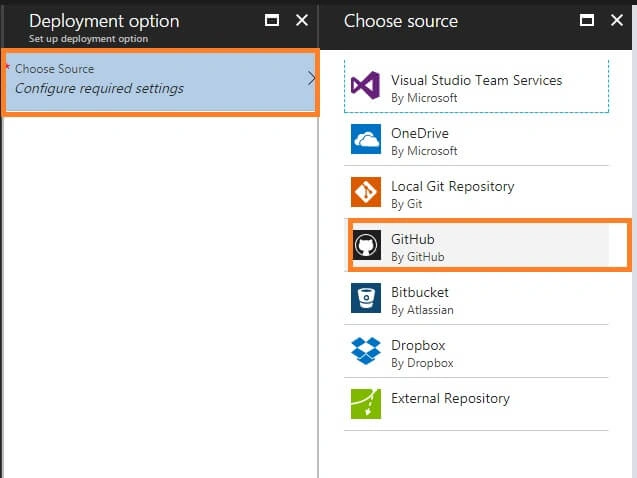
In the below screenshot, you can see there are different sources to add your website content. This time, we will use GitHub as primary source to add our Deployment Slot website content.
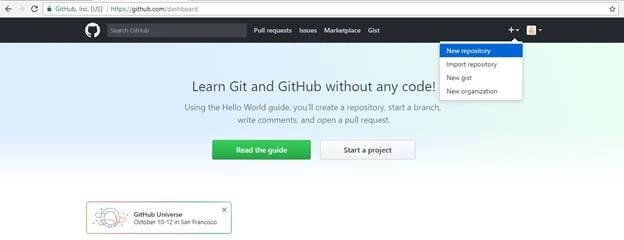
Before choosing GitHub as primary source, let’s create a GitHub account if you don’t have one. Once your account is created, click on the new repository as shown in the below screenshot. While creating a new repository, you will find a checkbox next to initialize Read me.md. This is a mandatory step while creating a repository so that you will get UI based repository.
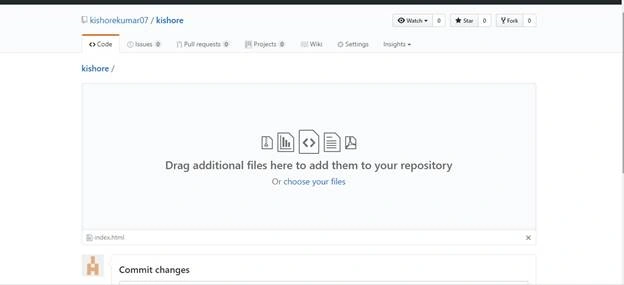
Once the repository has been created, click on the "Upload Files" button or drag & drop edited index.html file from the local machine. Once the file is uploaded, click "Commit Changes".
Go back to Azure portal, click GitHub from the previous screenshot. After choosing GitHub as your source, authorize your GitHub account to be used by your Azure web app. Choose your project as the repository name which was created in GitHub.
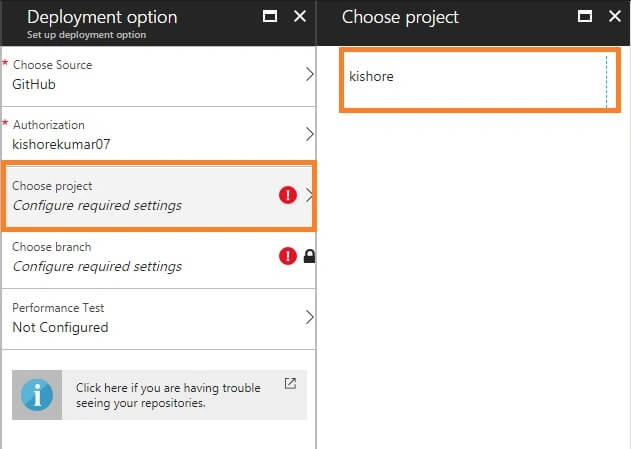
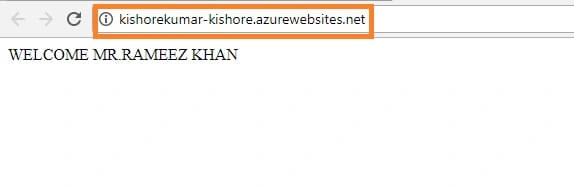
Click OK to configure your GitHub account with your web app. Go to Overview >> Browse to check if your website is hosted.
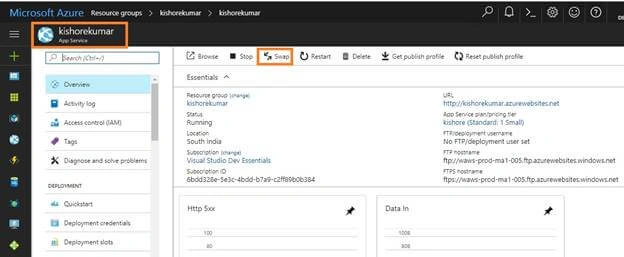
In the main Web App Overview, click on Swap button.
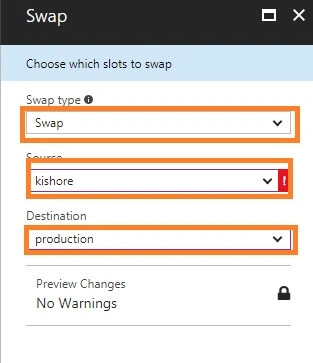
In Swap option, choose Swap type source as your Staging Slot name and destination as production. Then, click OK.
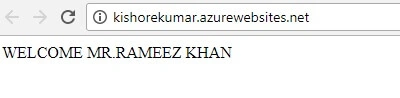
Once the web app is swapped, you will be notified and your Staging Slot website content would be moved to the primary website. And the primary website content would move to your Staging Slot.
Conclusion
So, we simply created a primary website and hosted our website through FTP login. Then, we used Staging Slot to create a secondary website and used GitHub as the prime source for this websites' content.
We will learn more in upcoming articles. Till then, keep learning!
Munish APosted May 27, 2018, 2:01 AM
Nice article, i created my first website by using azure.