

In this article, we will learn about creating a SQL Sever Database for authentication using Membership and Role Provider in SharePoint.
Step1
Creating database to store users for Forms Based Authentication(FBA)
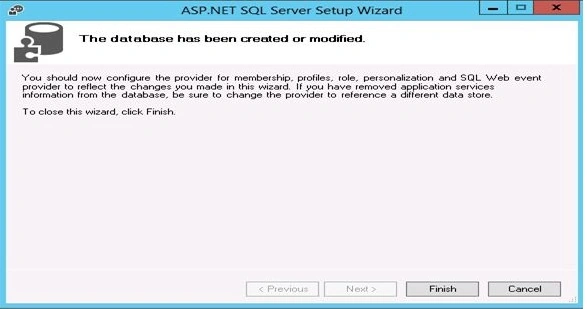
Run C:\Windows\Microsoft.Net\Framework\v4.0.30319\aspnet.regsql.exe

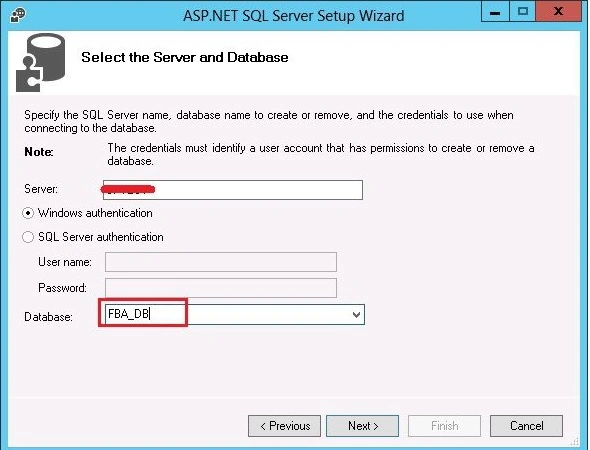
[Wizard opens] -> NEXT -> Server:.\SqlExpress[Sql Server Name].
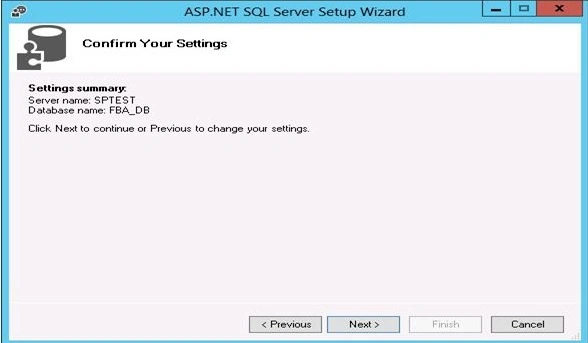
Select Windows Authentication [this is for SQL Server] -> Database:FBA_DB -> Finish.
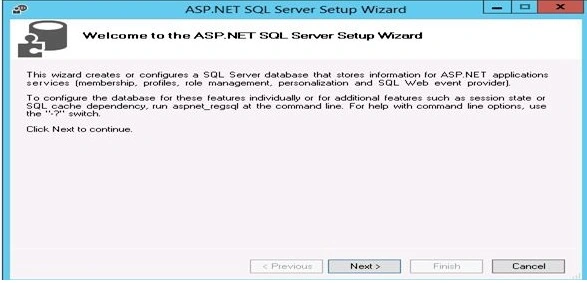
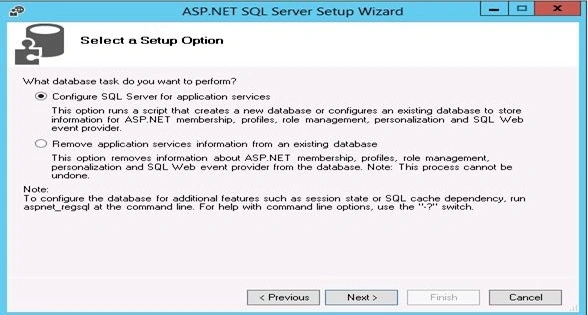
We can check in SQL Server, if a new database FBA_DB has been created.
Step 2
To add users
Open Visual Studio. Go to File -> New -> Website -> HTTP. C# -> D:\TempWebsite -> OK ( Ensure that FrameWork 4.5 is selected).
Edit web.config
Change from Windows to Forms Authentication : <authentication mode="Forms"/>
If it is not already existing, add a web.config file. Add the connection string under Configuration section.
- <connectionString>
- lt;add name="FBASqlCS" connectionString="server=.\sqlexpress;Integrated Security=True;database="FBA_DB"/>
- </connectionString>
Open C:\Windows\Microsoft.Net\Framework\v4.0.30319\Config\Machine.config
(Note: Please use Machine.config of MS.NET Framework 4.0)
Copy<membership> and >rolemanager> sections and paste in<system.web>section.
- <membership defaultProvider=”FBASqlMembershipProvider“>
- <providers>
- <add connectionStringName=”FBASqlCS”
- applicationName=”/”
- name=”FBASqlMembershipProvider“
- type=”System.Web.Security.SqlMembershipProvider, System.Web, Version=4.0.0.0, Culture=neutral, PublicKeyToken=b03f5f7f11d50a3a” />
- </providers>
- </membership>
<roleManager enabled"true" defaultProvider="FBASqlRoleProvider">
- <roleManager enabled=”true” defaultProvider="FBASqlRoleProvider">
- <providers>
- <add connectionStringName=”FBASqlCS”
- applicationName=”/”
- name=”FBASqlRoleProvider“
- type=”System.Web.Security.SqlRoleProvider, System.Web, Version=4.0.0.0, Culture=neutral, PublicKeyToken=b03f5f7f11d50a3a”/>
- </providers>
- </roleManager>
In [Menu Bar] Website, go to ASP.NET configuration->[a website admin page opens] select Authentication type-> How users will access:Internet-> OK.
Create Users & Roles as desired and confirm the same by checking in asp.net_users and asp.net_roles table of FBA_DB database.
Editing web.config of Web Application , Central Admin Application and STS
Editing web.config of Web Application , Central Admin Application and STS
The next set of steps configures the membership and role manager, which requires modifying three different web.config files: for web application, for the Central Administration website and for STS.
Editing Web Application web.config file
- Go to Administrative Tools->Internet Information Server
- Select Web Application Website-> Click the Explore option in the Actions section on the right-hand side of the page.
- Create a copy of web.config .
- Open web.config in the directory and between </sharepoint> and <system.web> add the <connectionStrings> (Copy from TempWebsite)
- Locate<membershio default provider="i"...> and add the "<add.." from <membership> section from temp website.
- Locate the <roleManager defaultProvider"c" enabled="true"....> element and add the <roleManager>content from TempWebsite.
Note - Don't change the default providers. By default, they are "i" and "c".
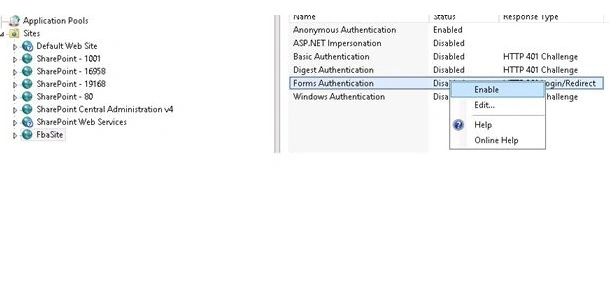
Editing Central Administration website web.config file
- Go to Administrative tool->Internet Information Server
- select Central Administration Web Application Website->Click the Explore option in the Action Section on the right-hand side of the page.
- Add the <connectionStrings> section (copy from TempWebsite).
- After<system.web> add the <membership> section <roleManager>section from TempWebsite.
- In <roleManager> change the defaultProvider to "AspNetWindowsTokenRoleProvider" and enabled="true" as given below.
<roleManager enabled="true" defaultProvider="AspNetWindowsTokenRoleProvider">
Editing Security Token Service(STS) website web.config file
- Go to Administrative tool->Internet Information Server
- Sites->Select SharePoint Web Services
- Click the explore option in the Actions section on the right-hand side of the page.
- Open web.config in the directory and before <system.web> add the <connectionstrings>(Copy from TemWebsite)
- Locate<membershio default provider="i"...> and add the "<add.." from <membership> section from temp website.
- locate the <roleManager defaultProvider"c" enabled="true"....> element and add the <roleManager>content from TempWebsite.
Note
Don't change the default providers. by default they are "i" and "c"
Don't change the default providers. by default they are "i" and "c"
Enable Form Based Authentication in Existing Web Application
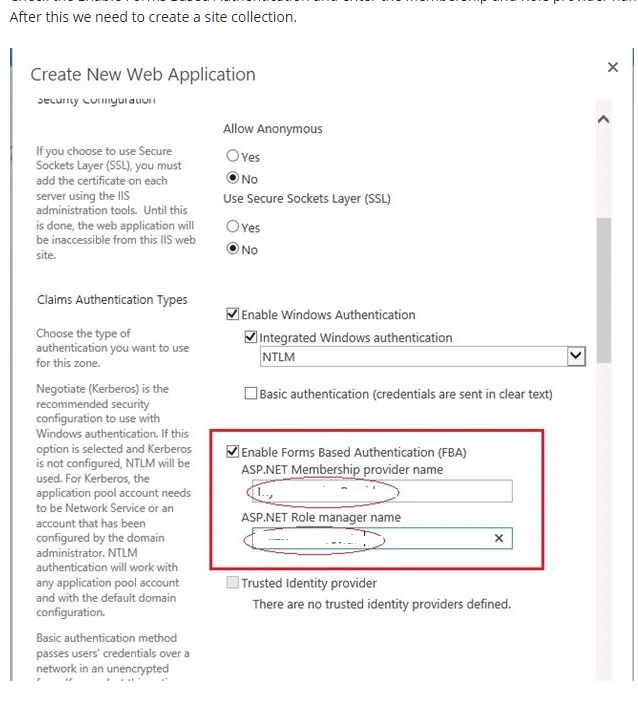
- Central Administration Site-> go to Manage Web Application-> Select Web Application-> Authentication Provider (Ribbon).
- Click on Default Link.
- CBA Types-> Check FBA-> Select ASP.NET membership Provider="FBASqlMembershipProvider" Role Provider="FBASqlRoleProvider"
Add users to the Web Application
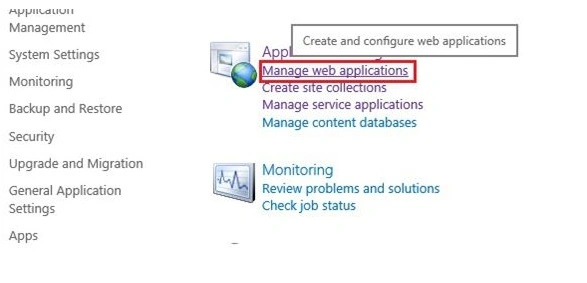
- Finally, go to Central Administration Website-> Application management ->Manage Web Aplication
- Select the Web Application -> User Policy -> Add Users.
- Add users which we have created SQL Server database.
Allowing Anonymous Access
- In Central Administrator-> Go to Manage Web Application Page.
- Select the Web Application-. Authetication Provider ->Click Default.
- Check Anonymous Access-> Save
- Go to SharePoint Web Application -. Login Administrator-. Site Permissions-. Anonymous Access.
- Click Anonymous Access Button in Ribbon-> Select Entire Website-> Ok .
Join the conversation! Your thoughts help the community grow.