

In late September, Microsoft showed us the first version of a new graphic library for WinRT, called Win2D. This library is a wrapper over Direct2D for universal apps. The best thing about Win2D is that it provides us access to the powerful DirectX for 2D graphics, without the need to go unmanaged with C++. We have all this power within our C# and XAML projects.
Win2D is a living project, currently in development. The team work uses sprints and every time they finish a sprint, they launch a new version. Until v0.0.7, the current one, you need to download the source code and compile it, they have a public Github repository here: https://github.com/Microsoft/Win2D. But with the latest 0.0.7 version they finally made binaries you can include in your project directly using NuGet. Simply search for Win2D in the package manager or write this sentence in the package console in Visual Studio:
PM> Install-Package Win2D
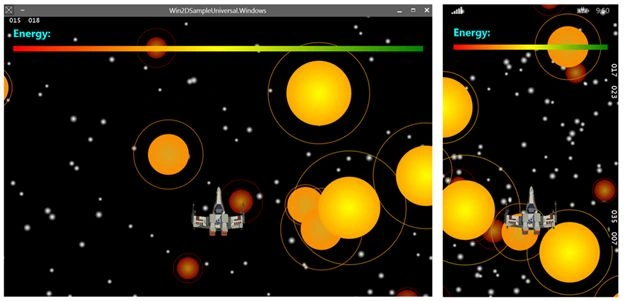
Now you have Win2D in your project, what can you do with it? There is many things you can do easily with Win2D. Only as a small example, you can have a look at the image below: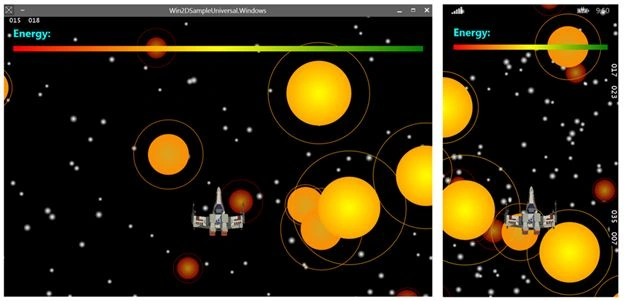
During this article, we will see how to get the preceding result, both in Windows 8.1 and Windows Phone 8.1. And sharing 100% of the code.
Draw surface
In every application using Win2D you will need a draw surface. This will define an area of your screen were Win2D can draw his magic. This area is defined by a XAML control called CanvasControl, not to be confused with the standard Canvas element we can find in XAML.
The CanvasControl element is defined in the Microsoft.Graphics.Canvas namespace. You need to add it to your page to use it as in the following:
- <Page
- x:Class="Win2DSampleUniversal.MainPage"
- xmlns="http://schemas.microsoft.com/winfx/2006/xaml/presentation"
- xmlns:x="http://schemas.microsoft.com/winfx/2006/xaml"
- xmlns:local="using:Win2DSampleUniversal"
- xmlns:d="http://schemas.microsoft.com/expression/blend/2008"
- xmlns:mc="http://schemas.openxmlformats.org/markup-compatibility/2006"
- xmlns:win2d="using:Microsoft.Graphics.Canvas"
- mc:Ignorable="d">
- <Grid>
- <win2d:CanvasControl x:Name="baseCanvas"/>
- </Grid>
- </Page>
- private void baseCanvas_Draw(CanvasControl sender, CanvasDrawEventArgs args)
- {
- using (var drawSession = args.DrawingSession)
- {
- drawSession.Clear(Colors.Blue);
- Vector2 center = new Vector2()
- {
- X = (float)sender.ActualWidth / 2.0f,
- Y = (float)sender.ActualHeight / 2.0f
- };
- float radius = 150;
- drawSession.FillCircle(center, radius, Colors.LightGreen);
- }
- }
- The ones starting with Fill, like FillCircle, FillRectangle. These methods draw a solid object in the screen, filled with the color indicated as a parameter.
- The ones starting with Draw, like DrawCircle and DrawEllipse. These methods draw a solid object in the screen, filled transparent, with a border of the indicated color.
So, in the code above, you draw a solid circle filled with a light green color, over a blue background. If you run now the application, you will get a result like the following: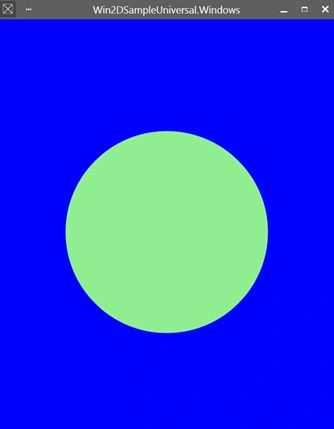
Now you understand how to draw, but the Draw event is launched only one time, when the CanvasControl is invalidated and included in our Page. If you want to make something more impressive than just a green static circle, you will need a way to animate content in screen.
Launching the Draw event periodically
In fact, in a perfect world you would want to draw your scene between 30 and 60 times per second. This is known as Frames Per Second (FPS), the more you are able to get, the more smooth your scene animation will look like.
You can use a DispatcherTimer, with an elapsed value of 30 or 33 milliseconds, to achieve the 60 frames per second mark. Set up the timer in the OnNavigatedTo method of your page, so it is activated immediately after showing the page the first time:
- protected override void OnNavigatedTo(NavigationEventArgs e)
- {
- base.OnNavigatedTo(e);
- this.random = new Random();
- this.timer = new DispatcherTimer();
- this.timer.Interval = new TimeSpan(0, 0, 0, 0, 30);
- this.timer.Tick += timer_Tick;
- this.timer.Start();
- }
- private void timer_Tick(object sender, object e)
- {
- this.timer.Stop();
- baseCanvas.Invalidate();
- }
Stars and planets
Now it is time to start thinking about our Universe. You can start by defining a new class called Planet:
- public class Planet
- {
- public Vector2 Position { get; set; }
- public float BodyRadius { get; set; }
- public float RingsRadius { get; set; }
- public CanvasRadialGradientBrush BodyColor { get; set; }
- public Color RingColor { get; set; }
- public float Acceleration { get; set; }
- }
For the color you can use the CanvasRadialGradientBrush type. This object allows you to create a radial gradient, center in the coordinates you set as center and with different colors:
- var gradient = new CanvasRadialGradientBrush(baseCanvas, Colors.Yellow, Colors.Orange);
- gradient.Center = new Vector2() { X = 10, Y = 10 };
- gradient.RadiusX = 40.0f;
- gradient.RadiusY = 40.0f;
- private void CreatePlanet(CanvasRadialGradientBrush bodyColor, float bodyRadius, float acceleration)
- {
- var planet = new Planet();
- Vector2 center = new Vector2()
- {
- X = (float)this.random.Next(0, (int)baseCanvas.ActualWidth),
- Y = (float)this.random.Next(0, (int)baseCanvas.ActualHeight)
- };
- planet.Position = center;
- planet.BodyRadius = bodyRadius;
- planet.BodyColor = bodyColor;
- planet.BodyColor.Center = planet.Position;
- planet.BodyColor.RadiusX = planet.BodyRadius;
- planet.BodyColor.RadiusY = planet.BodyRadius;
- planet.RingColor = planet.BodyColor.Stops.Last().Color;
- planet.RingsRadius = this.random.Next((int)planet.BodyRadius, (int)planet.BodyRadius * 2);
- planet.Acceleration = acceleration;
- this.planets.Add(planet);
- }
- private async Task CreateObjects()
- {
- for (int i = 0; i < 125; i++)
- {
- CreatePlanet(new CanvasRadialGradientBrush(baseCanvas, Colors.White, Colors.Transparent),
- this.random.Next(5, 10), (float)this.random.NextDouble());
- }
- for (int i = 0; i < 7; i++)
- {
- CreatePlanet(new CanvasRadialGradientBrush(baseCanvas, Colors.DarkGoldenrod, Colors.Maroon),
- this.random.Next(20, 30), (float)this.random.Next(1, 2));
- }
- for (int i = 0; i < 4; i++)
- {
- CreatePlanet(new CanvasRadialGradientBrush(baseCanvas, Colors.Goldenrod, Colors.DarkOrange),
- this.random.Next(40, 50), (float)this.random.Next(3, 4));
- }
- for (int i = 0; i < 3; i++)
- {
- CreatePlanet(new CanvasRadialGradientBrush(baseCanvas, Colors.Yellow, Colors.Orange),
- this.random.Next(65, 75), (float)this.random.Next(6, 7));
- }
- }
Now, on your timer tick event handler you can read the acceleration of every object and recalculate the vertical position of it, based on actual position + acceleration, something like this:
- private void timer_Tick(object sender, object e)
- {
- this.timer.Stop();
- foreach (Planet planet in this.planets)
- {
- planet.Position = new Vector2()
- {
- X = planet.Position.X,
- Y = planet.Position.Y < baseCanvas.ActualHeight ? planet.Position.Y + planet.Acceleration : -60
- };
- planet.BodyColor.Center = planet.Position;
- }
- baseCanvas.Invalidate();
- }
Finally, on your Draw event handler, you simply need to draw the objects as in the following:
- private void baseCanvas_Draw(CanvasControl sender, CanvasDrawEventArgs args)
- {
- using (var drawSession = args.DrawingSession)
- {
- drawSession.Clear(Colors.Black);
- foreach (Planet item in this.planets)
- {
- drawSession.FillCircle(item.Position, item.BodyRadius, item.BodyColor);
- drawSession.DrawCircle(item.Position, item.RingsRadius, item.RingColor);
- }
- }
- if (this.timer != null)
- this.timer.Start();
- }
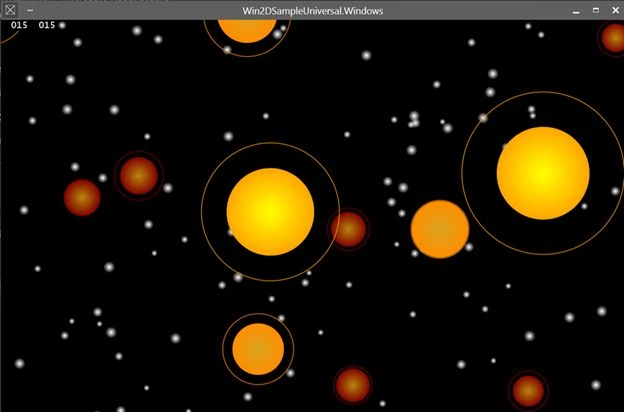
We only need a ship to travel and we are done!
But drawing a ship with only rectangles, ellipses or circles is a difficult task. Better if you can use a predefined image to do the job.
Working with bitmaps
Working with bitmap images in Win2D is fairly simple, you only need to add the PNG file to your project and use it to create a CanvasBitmap object as in the following:
- var img = await CanvasBitmap.LoadAsync(baseCanvas, @"Assets\Spaceship.png");
- public class Spaceship
- {
- public Vector2 Position { get; set; }
- public CanvasBitmap Image { get; set; }
- }
- this.spaceship = new Spaceship();
- this.spaceship.Image = await CanvasBitmap.LoadAsync(baseCanvas, @"Assets\Spaceship.png");
- this.spaceship.Position = new Vector2()
- {
- X = (float)(baseCanvas.ActualWidth / 2) - 60,
- Y = (float)(baseCanvas.ActualHeight / 1.5) - 55
- };
- if (this.spaceship != null && this.spaceship.Image != null)
- {
- drawSession.DrawImage(this.spaceship.Image,
- new Rect(this.spaceship.Position.X, this.spaceship.Position.Y, 120, 110),
- new Rect(0, 0, 1952, 1857));
- }
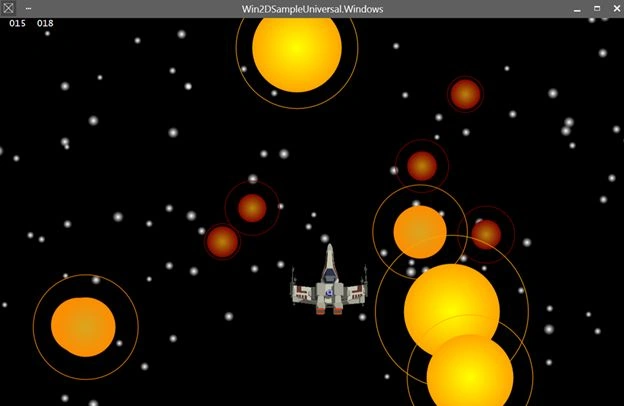
Now we need some indicators in it.
XAML and Win2D
Win2D uses the new SwapChainPanel released in Windows Phone 8.1 and Windows 8.1 so it can be mixed with other XAML content in the same page.
Is as easy as simply but the XAML over the CanvasControl and all will work in the way it is expected to work. You can use this behavior to use XAML for the parts of the screen that don't need to be hardware accelerated, like indicators, texts and images that create the user interface as in the following:
- <Grid>
- <win2d:CanvasControl x:Name="baseCanvas" VerticalAlignment="Stretch" HorizontalAlignment="Stretch"
- Draw="baseCanvas_Draw"
- ManipulationMode="All"
- ManipulationStarted="baseCanvas_ManipulationStarted"
- ManipulationCompleted="baseCanvas_ManipulationCompleted"
- ManipulationDelta="baseCanvas_ManipulationDelta"
- Margin="-50"/>
- <StackPanel VerticalAlignment="Top" HorizontalAlignment="Stretch" IsHitTestVisible="False">
- <TextBlock Text="Energy:" FontSize="24" FontWeight="Bold" Foreground="Cyan" Margin="24,24,0,0"/>
- <ProgressBar x:Name="EnergyBar" Minimum="0" Maximum="100" Value="100" Background="Transparent"
- Margin="24,12,24,0" Height="12">
- <ProgressBar.Foreground>
- <LinearGradientBrush StartPoint="0,0" EndPoint="1,0">
- <GradientStop Offset="0" Color="Red"/>
- <GradientStop Offset=".5" Color="Yellow"/>
- <GradientStop Offset="1" Color="Green"/>
- </LinearGradientBrush>
- </ProgressBar.Foreground>
- </ProgressBar>
- </StackPanel>
- </Grid>
There are many possible improvements you can do and need to do indeed, to this code to turn it on a real game, but I think this little article can help you get a first contact with the awesome technology of Win2D.
Shweta GiriyammanavarPosted Sep 25, 2017, 8:40 AM
I have a shape and want to apply RadialGradientBrush to that shape
Szandra EcsegiPosted Jun 11, 2015, 9:30 AM
project?????
Benoit ArchambaultPosted Nov 27, 2014, 1:55 PM
OK I figured it out, nice!
Benoit ArchambaultPosted Nov 27, 2014, 1:34 PM
Exciting but package installation does not install...
Vithal WadjePosted Nov 27, 2014, 1:08 PM
excellent,thanks for sharing
Mahesh ChandPosted Nov 27, 2014, 12:57 PM
Great work! Nice graphics,
Jeetendra GundPosted Nov 27, 2014, 3:51 AM
great work, nice explanation, Thanks for sharing sir