
Introduction
In this article, we will see how to use Sequelize CLI to create a table for our database and how can we set up a relationship between the two tables using foreign keys.
Prerequisites
- Node
- MySQL
Project structure
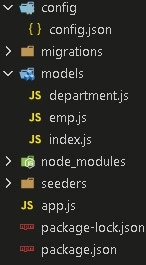
Setup the node project
- Open the console and type the below cmd to make a new directory.
Bash
mkdir seqlcli - Then change to that directory by typing the below cmd.
Bash
# cd seqlcli
Setup Node in the project
- Now type the below cmd on the console which will generate the package.json file.
Bash
# npm init - It will ask you to provide the basic details related to the package.json file like name, version, author, etc.
- After the file is initialized, we can build our node project.
- The file will have all the metadata related to our project.
Install packages
Now, we will install the package required for building our application.
- On console type
Bash
npm install --save sequelize mysql2 sequelize-cli express body-parser - Express: This is a framework on which the complete application will be built.
- Body-parser: This will fetch the form data from the coming request.
- Sequelize: This will contain all the files related to Sequelize ORM.
- Mysql2: This is a driver related to our database.
- Sequelize CLI: This allows us to make the use of sequelize files from the command line
Setup sequelize
Now we will set up a Sequelize structure required for building the application.
On console type
# sequelizeThis will give you the following output.
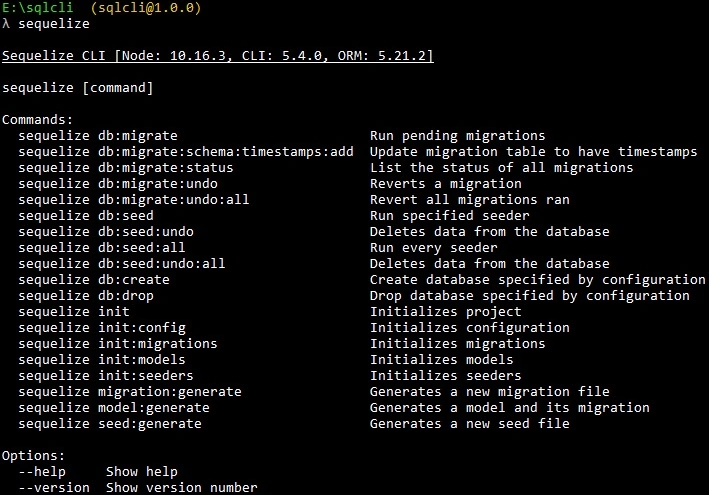
This shows that sequelize CLI is properly initialized.
Now initialize Sequelize by typing
#sequelize init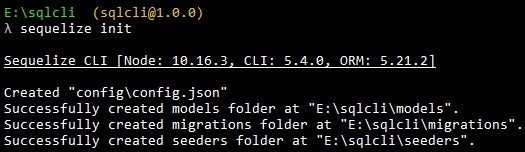
It will generate the following folder.
- Config: Will contain the config.json file which will contain the connection details.
- Models: This will contain an index.js file. This file will be generated with Sequelize CLI and collect all the models from the models directory and associate them if needed.
- Migrations: This will contain the migration files. The migration file is a change in that model or you can say the table used by CLI. It treats migrations like a commit or a log for changes in the database.
- Seeders: It will contain the seeder files. The seeder files are those which will contain data that we want to put in the table by default.
Create a Model
Now we will generate two models or tables for our database.
- Department
Bash
#sequelize model:generate --name department --attributes dbName:string - Emp
Bash
# sequelize model:generate --name emp --attributes name:string,salary:integer
The model generates a command requires two options
- Name: Name of the model.
- Attributes: The fields or attributes of the model/table.
Now we will get two models in our model folder with department, and emp name.
Two files will be added to the migration folder, which will contain the table schema of both these models.
Remember if we want to add or remove any field from the table then we will have to make changes in both the migration file and the model file of that particular model.
Make relationship
Now we will make a relationship between the department and the emp table through foreign Key.
To make a relationship between the two we use.
- HasMany.
- BelongsTo
- HasMany: It describes a 1:n or n:n relationship. The department table can have many relationships.
- BelongsTo: It describes a 1:1 or n:1 relationship.The emp table will have one relationship that is with the department.
- Open the department model and apply a relationship to it.
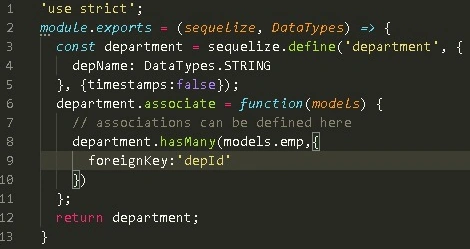 JavaScript
department.hasMany(models.emp, { foreignKey: 'depId' });
Here, the department model can have multiple relationships. One will be with the emp model.
Now we will specify the name of the column/attribute of the emp model which will contain the department references in the emp model.
So we have to tell the department model which column/attribute in emp will contain its references.
Here the depId will contain the reference of the department in the emp model.
We do it by providing it in foreign-key
Open the emp model/table schema.
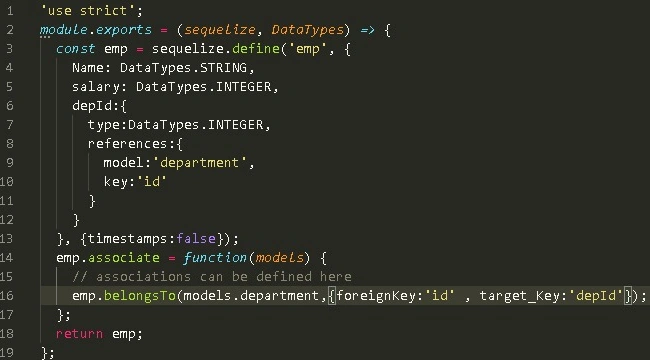
emp.belongsTo(models.department, { foreignKey: 'id', targetKey: 'depId' });Emp will have a relationship with the department. These two will be linked with each other through the depId column/attribute present in the emp model.
The column/attribute of the department which will be used for the reference will be the ID.
Here target _Key will contain the linking column/attribute and foreignKey will contain the reference column/attribute.
Now we have to make changes in the migration file.
Open the migration file for the emp model and update it.
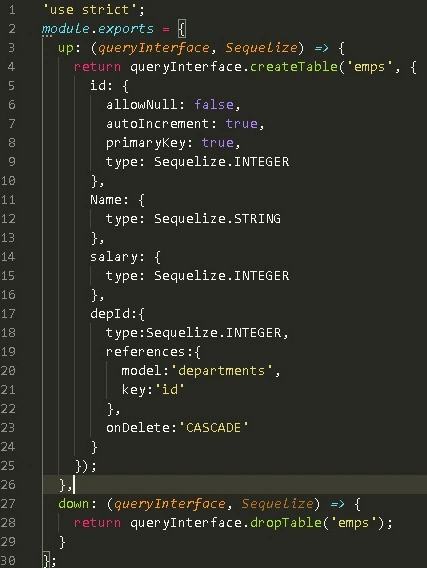
Here we add the deptId attribute/column on which we apply the foreign key constraint.
The references will contain the model and key
- Model: Refers to the table name in which we want to create a relationship.
- Key: Will contain the column name which will be referred to while performing data manipulation in the table/model.
Perform Migration
- Now insert the table into the database.
- On the console type.
Bash
# sequelize db:migrate
This command will execute the following steps
- Ensures a table called SequelizeMeta is in the database. This table is used to record which migrations have run on the current database.
- Starts looking for any migration files that haven't run yet. This is possible by checking the SequelizeMeta table.
- This will create a table in our database. Here, it will create two tables in the database department, emp.
Note. When we run db: migrate then the up function int the migration file will be called.
Undo Migration
We can use db:migrate:undo, this command will revert the most recent migration.
When we run the above command then the down function in the migration file will be called.
Setup app.js
- Now add a new file app.js
- After that open the package.json and in scripts write starts:'node app.js'
Add the below code in the app.js.
var express = require('express');
var bodyParser = require('body-parser');
var deptModel = require('./models').department;
var empModel = require('./models').emp;
var app = express();
// fetch form data from the request
app.use(bodyParser.urlencoded({ extended: false }));
app.use(bodyParser.json());
app.post('/adddept', (req, res) => {
    // it will add data to department table
    deptModel.create(req.body)
        .then(function(data) {
            res.json({ da: data });
        })
        .catch(function(error) {
            res.json({ er: error });
        });
});
app.post('/addemp', (req, res) => {
    // it will add data to emp table
    empModel.create(req.body)
        .then(function(data) {
            res.json({ da: data });
        })
        .catch(function(error) {
            res.json({ er: error });
        });
});
app.post('/deldept/:id', (req, res) => {
    // it will delete particular department data
    deptModel.destroy({ where: { id: req.params.id } })
        .then(function(data) {
            res.json({ da: data });
        })
        .catch(function(error) {
            res.json({ er: error });
        });
});
app.get('/', (req, res) => {
    // this will join the tables and display data
    empModel.findAll({ include: [{ model: deptModel }] })
        .then(function(data) {
            res.json({ da: data });
        })
        .catch(function(error) {
            res.json({ er: error });
        });
});
// assign the port
var port = process.env.port || 3000;
app.listen(port, () => console.log('server running at port' + port));
Output
- Add department
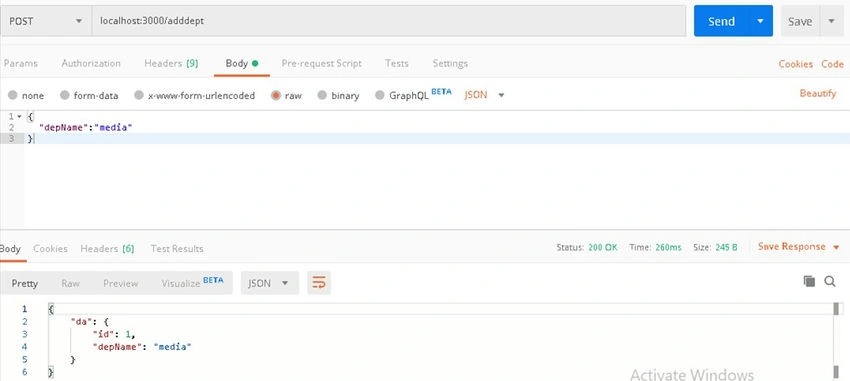
- Add employee
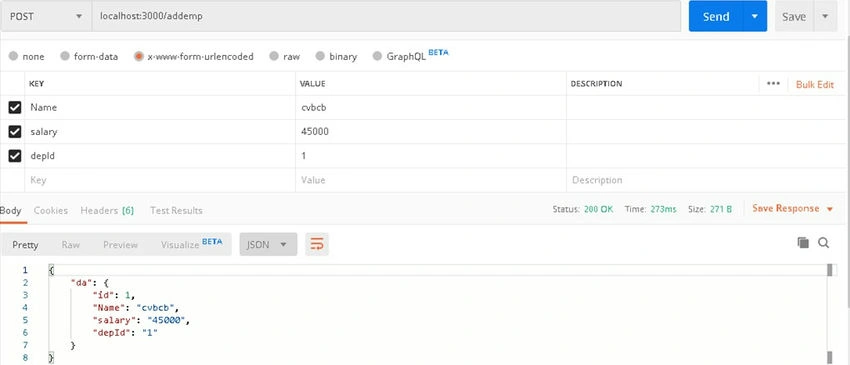
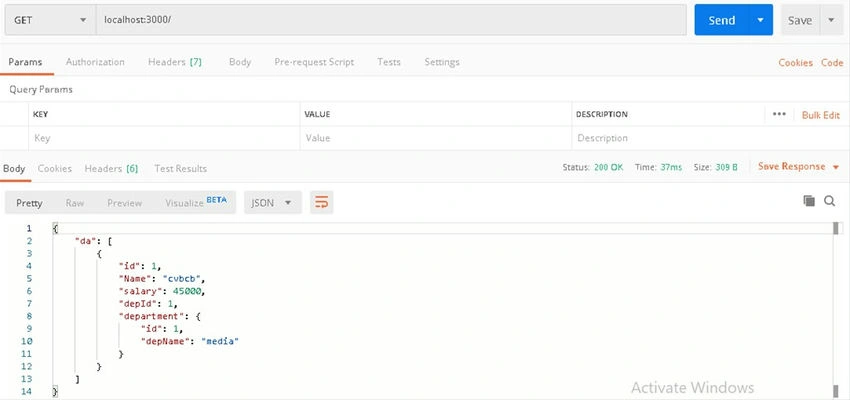
- Display data
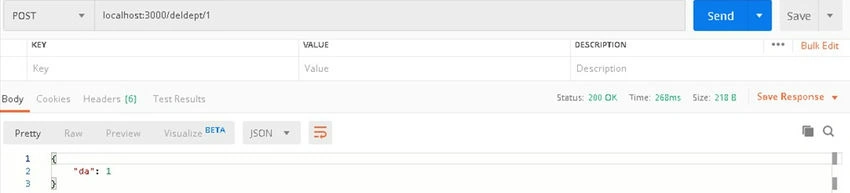
- Delete dept
- Display data after delete
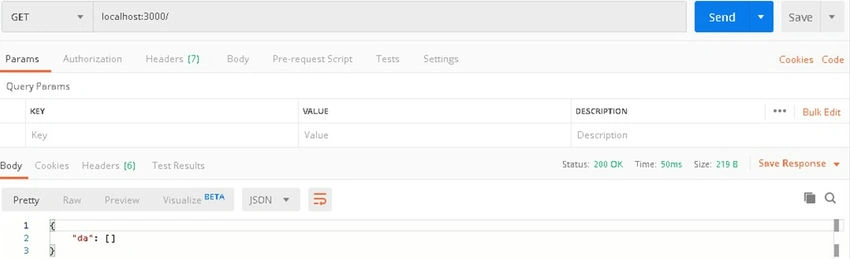
Here we see when we delete the record from the department table then the same records from its child will also be deleted.
As you have seen above we are using onDelete:'CASCADE'. You can read about it more from the links given in the references.
References
- https://sequelize.org/v5/manual/migrations.html
- https://softwareengineering.stackexchange.com/questions/152731/what-is-the-main-difference-between-has-many-and-belongs-to-relationship-in-mysq
- https://stackoverflow.com/questions/50584682/sequelize-model-migration-file-and-foreign-key-which-one-is-right
- https://dba.stackexchange.com/questions/44956/good-explanation-of-cascade-on-delete-update-behavior
- https://gist.github.com/zcaceres/83b554ee08726a734088d90d455bc566
zephyr primePosted Sep 18, 2020, 7:33 PM
I think the code to generate the tables is wrong It has mispellings and missing fields.Shouldn't this: sequelize model:generate --name department --attributes dbName:string be: sequelize model:generate --name department --attributes depName:string and sequelize model:generate --name emp --attributes name:string,salary:integer be sequelize model:generate --name emp --attributes name:string,salary:integer,depId:integer