

Introduction
In this article we will use the Repeat button control of XAML in a Metro style application. The concept behind the Repeat button is that we can do a click event multiple times as needed and each time we do, it performs the associated action.
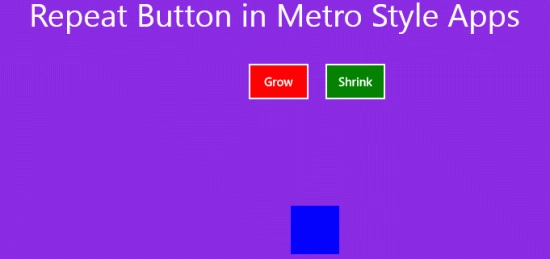
Here we used two repeat buttons, Grow and Shrink and we use a rectangle control. On a click event of the buttons the height and width of the rectangle will be changed, no matter how many times you click on the button. It has no limitation.
Step 1 : First, you will create a new Metro Style Application. Let us see the description with images of how you will create it.
- Open Visual Studio 2011
- File -> New -> Project
- Choose Template -> Visual C# ->Metro Style Application
- Rename the application
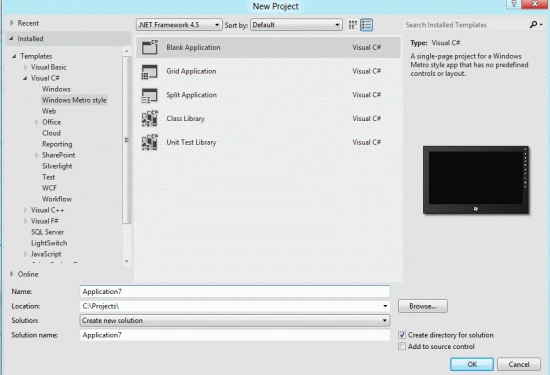
Step 2 : In the Solution Explorer there are two files that we will primarily work with; the BlankPage.xaml and BlankPage.xaml.cs files.
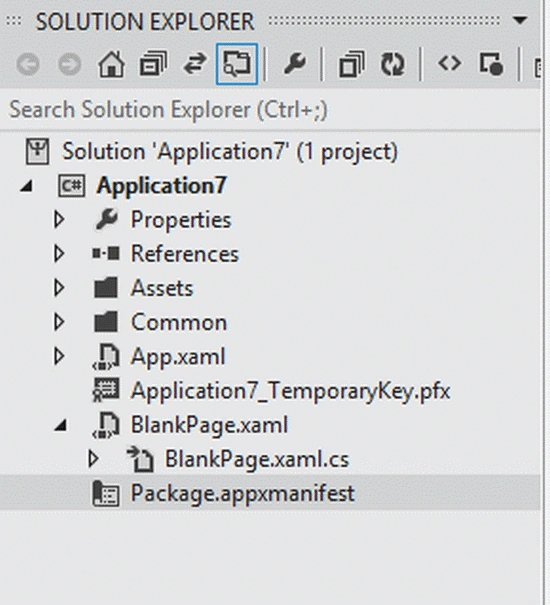
Step 3 : The BlankPage.xaml file is as in the following code:
Code :
<Page
x:Class="Application7.BlankPage"
xmlns="http://schemas.microsoft.com/winfx/2006/xaml/presentation"
xmlns:x="http://schemas.microsoft.com/winfx/2006/xaml"
xmlns:local="using:Application7"
xmlns:d="http://schemas.microsoft.com/expression/blend/2008"
xmlns:mc="http://schemas.openxmlformats.org/markup-compatibility/2006"
mc:Ignorable="d">
<Grid Name="LayoutRoot" Background="BlueViolet">
<Grid.RowDefinitions>
<RowDefinition Height="0.033*"/>
<RowDefinition Height="0.033*"/>
<RowDefinition Height="0.333*"/>
</Grid.RowDefinitions>
<TextBlock Text="Repeat Button in Metro Style Apps" Grid.Row="0"
FontSize="40" HorizontalAlignment="Center"
VerticalAlignment="Center">
</TextBlock>
<RepeatButton Margin="10,10,0,0" VerticalAlignment="Top"
HorizontalAlignment="Center"
Name="GrowButton" Width="80" Height="50"
Delay="500" Interval="100"
Click="GrowButton_Click" Grid.Row="1"
Background="Red">
Grow
</RepeatButton>
<RepeatButton Margin="200,10,0,0" VerticalAlignment="Top"
HorizontalAlignment="Center"
Name="ShrinkButton" Width="80" Height="50"
Delay="500" Interval="100"
Click="ShrinkButton_Click" Grid.Row="1"
Background="Green">
Shrink
</RepeatButton>
<Rectangle Name="Rect" Height="200" Width="200" Fill="Blue"
Grid.Row="2" HorizontalAlignment="Center"
VerticalAlignment="Top" Margin="100,100,0,0">
</Rectangle>
</Grid>
</Page>
Step 4 : The BlankPage.xaml.cs file is as in the following code:
Code :
using System;
using System.Collections.Generic;
using System.IO;
using System.Linq;
using System.Xml.Linq;
using System.Text;
using Windows.Foundation;
using Windows.Foundation.Collections;
using Windows.UI.Xaml;
using Windows.UI.Xaml.Controls;
using Windows.UI.Xaml.Controls.Primitives;
using Windows.UI.Xaml.Data;
using Windows.UI.Xaml.Input;
using Windows.UI.Xaml.Media;
using Windows.UI.Xaml.Navigation;
namespace Application7
{
public sealed partial class BlankPage : Page
{
public BlankPage()
{
this.InitializeComponent();
}
protected override void OnNavigatedTo(NavigationEventArgs e)
{
}
private void GrowButton_Click(object sender, RoutedEventArgs e)
{
Rect.Width += 10;
Rect.Height += 10;
}
private void ShrinkButton_Click(object sender, RoutedEventArgs e)
{
Rect.Width -= 10;
Rect.Height -= 10;
}
}
}
Step 5 : After running this code the output looks like this:
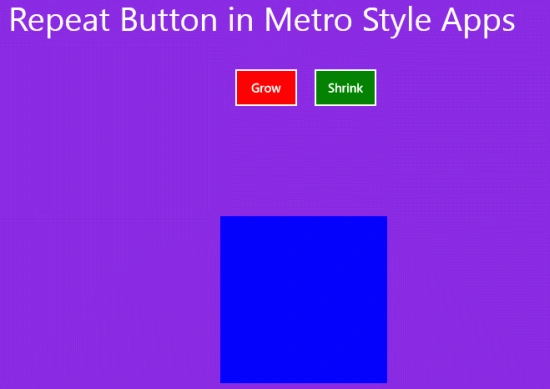
Clink on the Grow button; we can increase the size as we want.
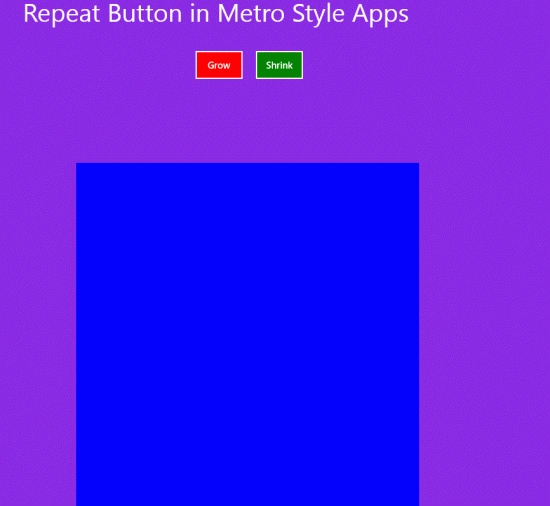
Click on the Shrink button; we can decrease the size as much as we want.
Join the conversation! Your thoughts help the community grow.