

Overview
SharePoint Framework (SPFx) based web parts are the key to develop custom solutions in modern SharePoint. A web part can contain various controls in it. Some controls help in getting the inputs from end-users (like textbox, dropdowns, choices, etc.). Also, some controls generate an event to process the user inputs (e.g. button click event). The event defines what happens when a certain action is taken on the control. As a developer, we need to define the piece of code that should run when an action is triggered on the control.
In this article, we will explore how we can bind actions to controls in SharePoint framework solutions developed using React. Also, how we can autobind the events to the control.
Develop SharePoint Framework Web Part
Open command prompt. Create a directory for SPFx solution.
- md spfx-react-autobind
Navigate to the above created directory.
- cd spfx-react-autobind
Run Yeoman SharePoint Generator to create the solution.
- yo @microsoft/sharepoint
Yeoman generator will present you with the wizard by asking questions about the solution to be created.
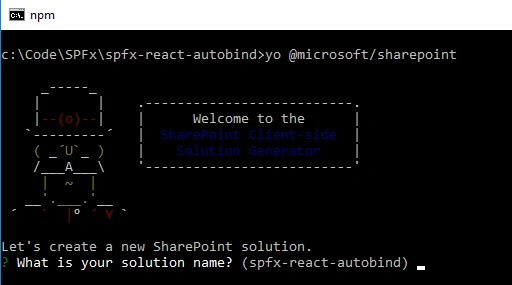
Solution Name: Hit Enter to have default name (spfx-react-autobind in this case) or type in any other name for your solution.
Selected choice: Hit Enter
Target for component: Here, we can select the target environment where we are planning to deploy the client webpart i.e. SharePoint Online or SharePoint OnPremise (SharePoint 2016 onwards).
Selected choice: SharePoint Online only (latest)
Place of files: We may choose to use the current folder or create a subfolder for our solution.
Selected choice: Use the current folder
Deployment option: We may choose to allow the tenant admin the choice of being able to deploy the solution to all sites immediately without running any feature deployment or adding apps in sites.
Selected choice: N (install on each site explicitly)
Permissions to access Web APIs: We may choose the components in the solution require permissions to access web APIs that are unique and not shared with other components in the tenant.
Selected choice: N (No explicit permissions are required)
Type of client-side component to create: We can choose to create client side webpart or an extension. Choose webpart option.
Selected choice: WebPart
Web part name: Hit Enter to select the default name or type in any other name.
Selected choice: ReactAutoBind
Web part description: Hit Enter to select the default description or type in any other value.
Selected choice: Auto bind events in React
Framework to use: Select any JavaScript framework to develop the component. Available choices are - No JavaScript Framework, React, and Knockout.
Selected choice: React
Yeoman generator will perform scaffolding process to generate the solution. The scaffolding process will take a significant amount of time.
Once the scaffolding process is completed, lock down the version of project dependencies by running the below command.
- npm shrinkwrap
In the command prompt, type below command to open the solution in a code editor of your choice.
- code .
Development Scenario
We will add a textbox and button to our webpart. On the click of button, we will display a greeting message to text entered in textbox.
Define a State
Let us define a state to store the user entered text. Add a file IReactAutoBindState.ts under the “\src\webparts\reactAutoBind\components\” folder.
- export interface IReactAutoBindState {
- userText: string;
- }
Add Controls to Web Part
Open ReactAutoBind.tsx under “\src\webparts\reactAutoBind\components\” folder and add the below imports.
- // Import text field component
- import { TextField } from 'office-ui-fabric-react/lib/TextField';
- // Import button component
- import { IButtonProps, DefaultButton } from 'office-ui-fabric-react/lib/Button';
- public render(): React.ReactElement<IReactAutoBindProps> {
- return (
- <div className={styles.reactAutoBind}>
- <div className={styles.container}>
- <div className={styles.row}>
- <div className={styles.column}>
- <span className={styles.title}>Welcome to SharePoint!</span>
- <p className={styles.subTitle}>Autobind events demo</p>
- <TextField
- required={true}
- name="txtSearchText"
- placeholder="Search..."
- value={this.state.userText}
- onChanged={e => this.setState({ userText: e })}
- />
- <DefaultButton
- data-automation-id="search"
- target="_blank"
- title="Greet"
- onClick={this.greetButtonClicked}
- >
- Greet
- </DefaultButton>
- <div>{this.state.userText}</div>
- </div>
- </div>
- </div>
- </div>
- );
- }
- private greetButtonClicked(): void {
- alert("Hello " + this.state.userText);
- }
- constructor(props: IReactAutoBindProps, state: IReactAutoBindState) {
- super(props);
- this.state = {
- userText: ""
- }
- }
Run the SPFx WebPart
- On the command prompt, type “gulp serve”.
- Open SharePoint site.
- Navigate to /_layouts/15/workbench.aspx.
- Add the webpart to page.
- Type in some text to the textbox.
- Click the "Greet" button.
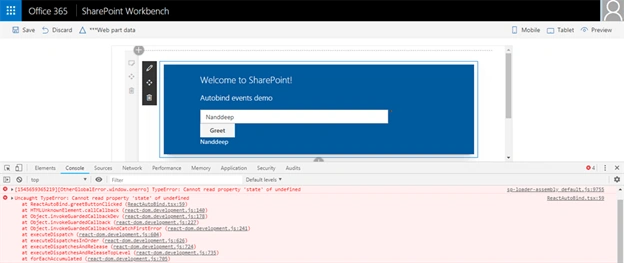
We expect to see the alert message greeting the text entered in the textbox. But nothing happens. If we observe the developer toolbar console, we have an error “Cannot read property 'state' of undefined at ReactAutoBind.greetButtonClicked”. This means our event has not been bound to our button control.
Bind event to button
In the constructor, add the below code.
- constructor(props: IReactAutoBindProps, state: IReactAutoBindState) {
- super(props);
- this.state = {
- userText: ""
- }
- this.greetButtonClicked = this.greetButtonClicked.bind(this);
- }
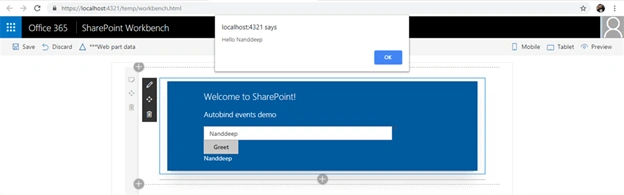
Binding all events at once
There are chances that we forget to add the bindings in constructor for our control. As the number of controls grows on the web part, it might be a huge code for only event binding. To handle this in a graceful way, we can use autobind.
Add the below import.
- import { autobind } from 'office-ui-fabric-react';
Remove any bindings from Constructor.
Decorate event with @autobind.
- @autobind
- private greetButtonClicked(): void {
- alert("Hello " + this.state.userText);
- }
Summary
It is necessary to bind actions to controls. An action can be bound in a constructor individually to the control. Autobind helps to bind the action to control by decorating the method.
Arvind SinghPosted Jan 6, 2019, 7:19 AM
Nice article , good explanation..