

The boot system in Windows Vista Operating System (and later Windows version) is completely different from the boot of traditional Microsoft NT-core based Operating Systems. In this article we are going to explain the principal differences between these two boot systems. The boot sequence is the following:
If we knew the syntax of BOOT.INI file and we lost it (for example C:\ was formatted) then we could remake this file. A full description of BCDEDIT command is available in the following URL: http://technet.microsoft.com/en-us/library/cc721886.aspx
Boot system characteristics of NT-core based Operating Systems (Windows 2000, XP, 2003 Server)
Master Partition Table: This small bit of code that is referred to as a table that contains a complete description of the partitions that are contained on the hard disk.
Master Boot Code: Is the small bit of computer code that the BIOS loads and executes to start the boot process. 
Figure 1: An example of BOOT.INI file content. Note that in this case are installed 2003 Server and XP Operating Systems in the computer.
Changes introduced by Windows Vista
The philosophy of Windows Vista changes drastically. The main changes are the followings:
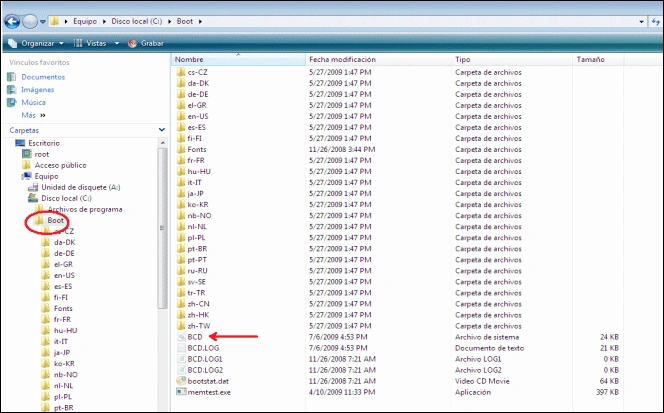
Figure 2: An example of the Boot folder content. Note that BCD file is located inside this folder.
The boot sequence in Vista is the following:
The boot process in this case shows the following 2 lines menu:
-Legacy (pre-Longhorn) Microsoft Windows Operating System
-Microsoft Windows
If we clicked in the first line, the load process of the old Windows operating systems would start. So the classic menu (that is embedded in the BOOT.INI file) is shown.
The second line (there one line of this style for each Windows Vista installed on our computer) allows us to start Windows Vista.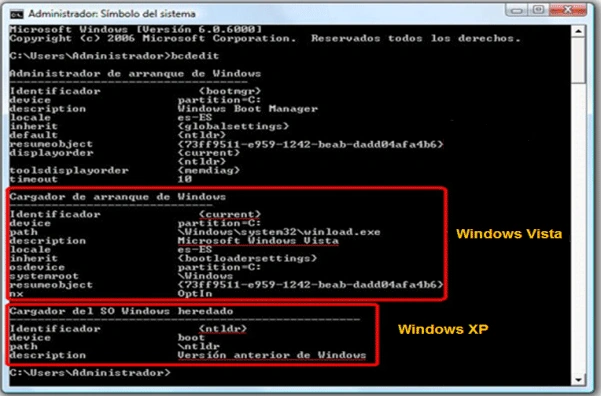
Figure 3: An example of the use of BCDEDIT tool to manage the boot parameters in Windows Vista. Note that in this case Vista and XP are installed in the computer.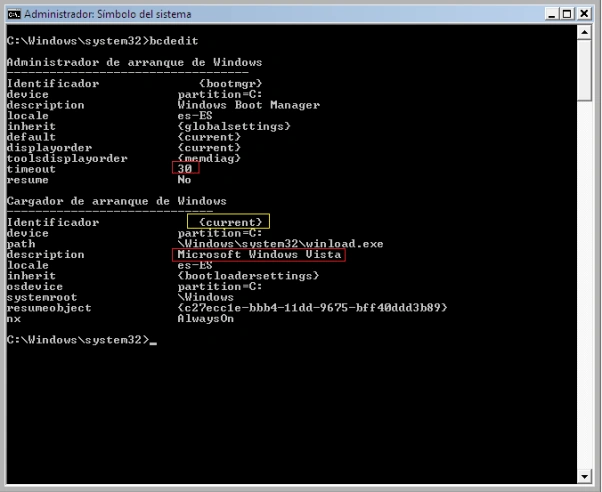
Figure 4: An example of the use of BCDEDIT tool to manage the boot parameters in Windows Vista. Note that the parameters inside the red rectangles could be changed.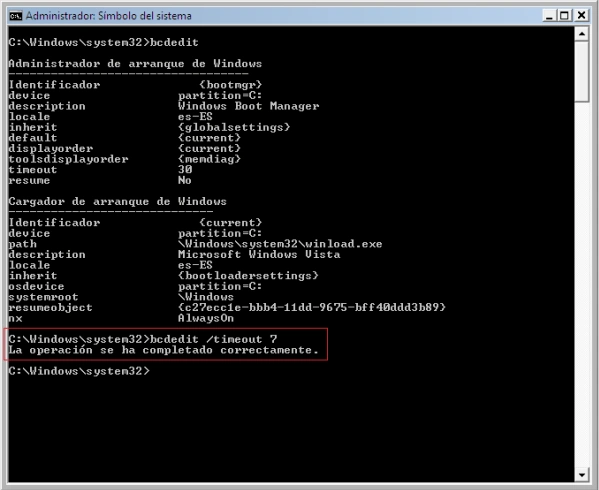
Figure 5: An example of the use of BCDEDIT tool. Note that the timeout parameter has been changed to value 7.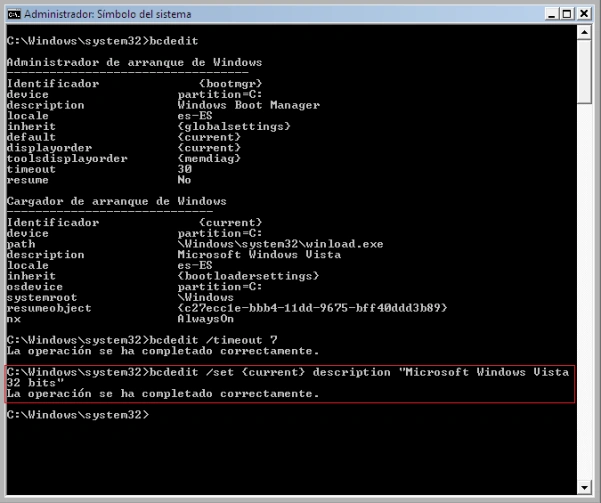
Figure 6: An example of the use of BCDEDIT tool. Note that the description parameter has been changed to Microsoft Windows Vista 32 bits.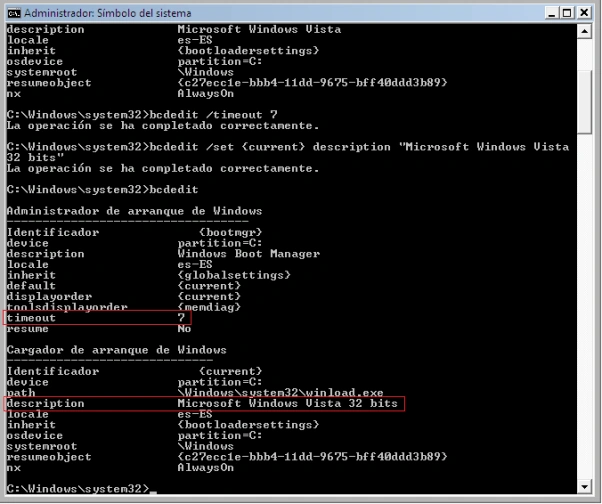
Figure 7: A confirmation that timeout and description parameters have been changed.
Loading
Join the conversation! Your thoughts help the community grow.