

Introduction
Today, in this article let's play around with one of the interesting and most useful concepts in Azure.
Question: What is update data to cloud database using Azure?
In simple terms "It enables the update of data to the cloud database and maintenance using Azure".
Step 1: Create a cloud database named "Company".
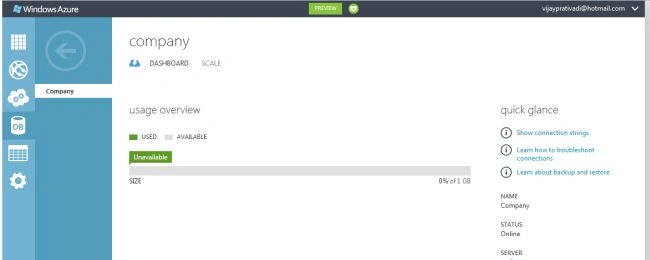
Step 2: With the help of the manage URL navigate to a specific server page.
Manage URL: etc6zpqnyc.database.windows.net
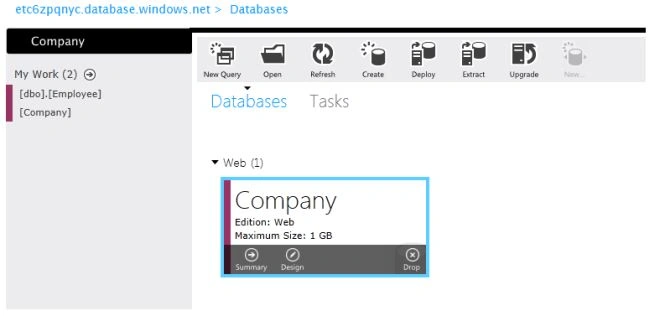
Step 3: Company database showing up in the database server page:
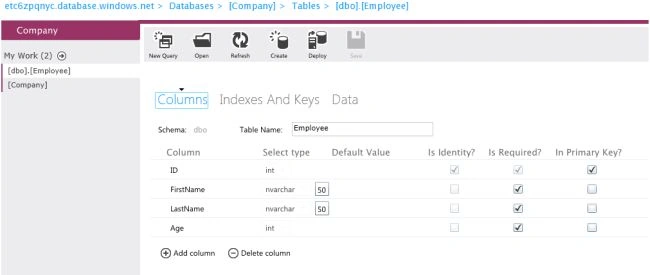
Step 4: Create an employee table. The design mode of the employee table looks like this:
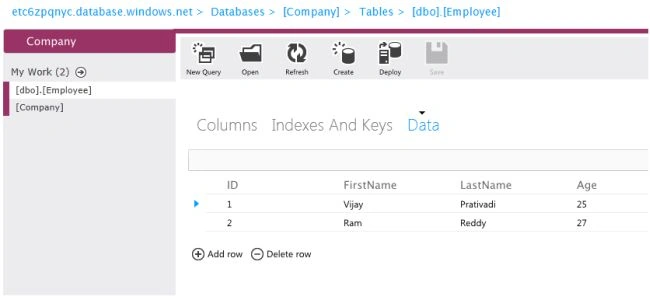
Step 5: Insert some data into the table:
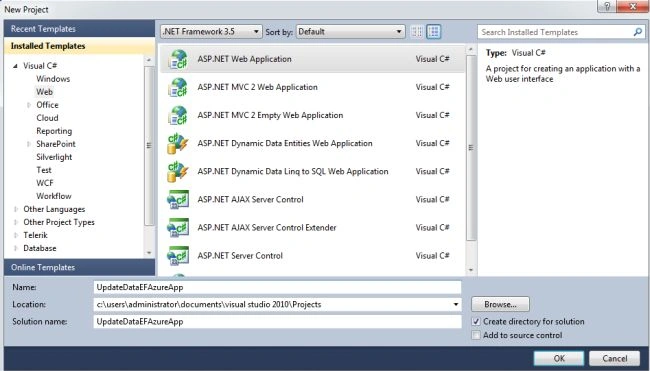
Step 6: Open Visual Studio 2010 and create an "ASP.NET Web Forms Application", as in:
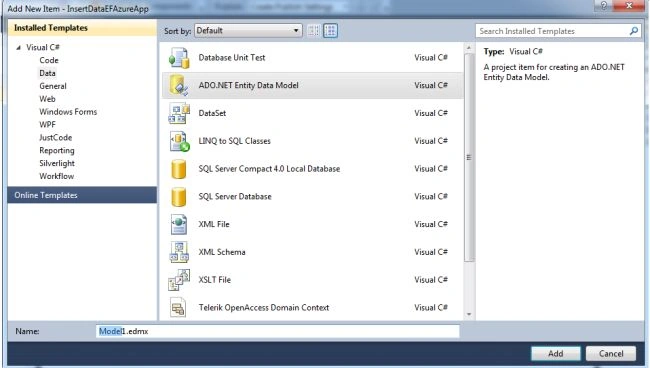
Step 7: Add an EDMF item to the project.
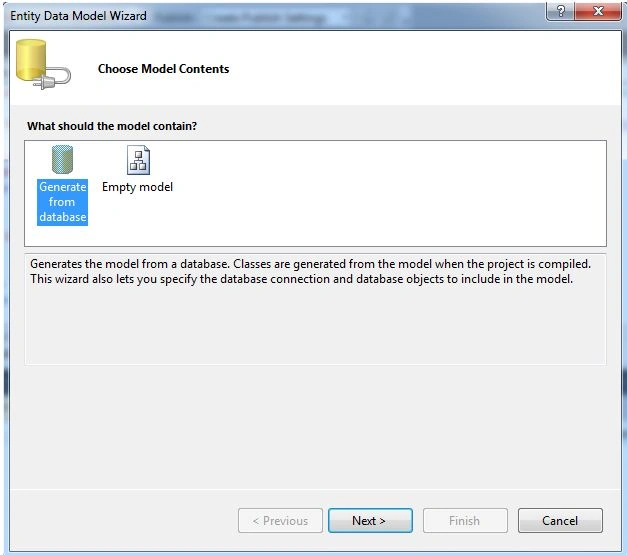
Step 8: Choose generate from database and click the "Next" button; see:
Step 9: Add a new connection.
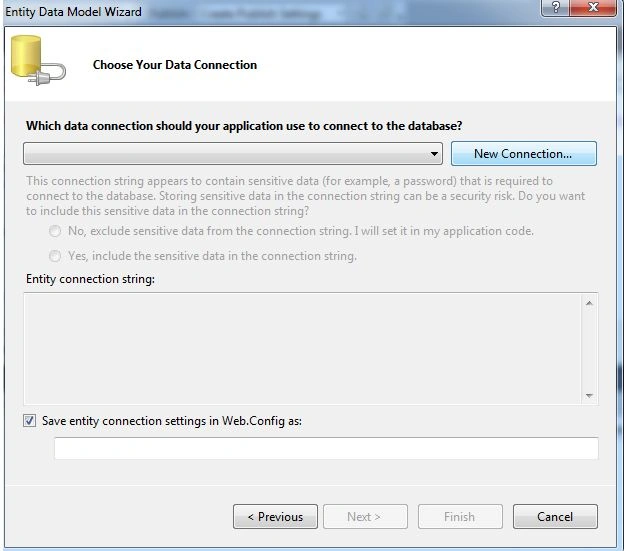
Step 10: Provide the necessary server details for the connection and click ok.
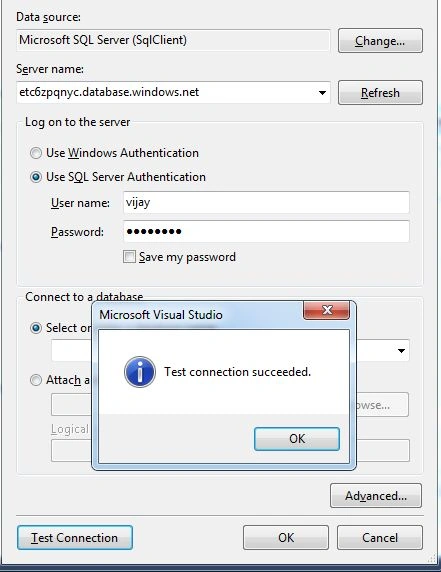
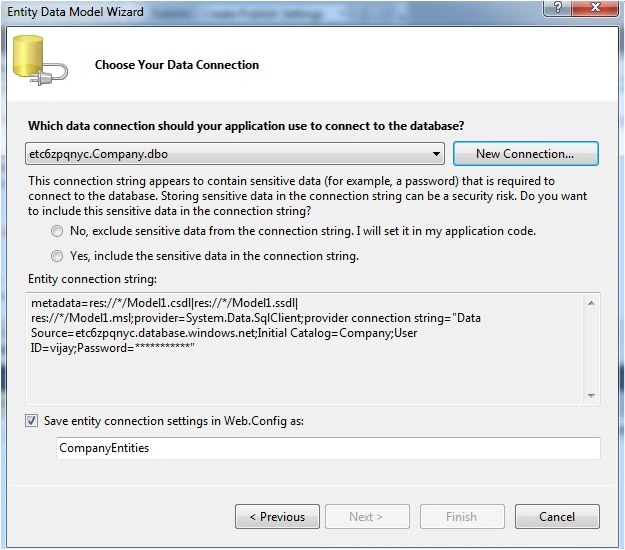
Step 11: Connection is established and click the "Next" button.
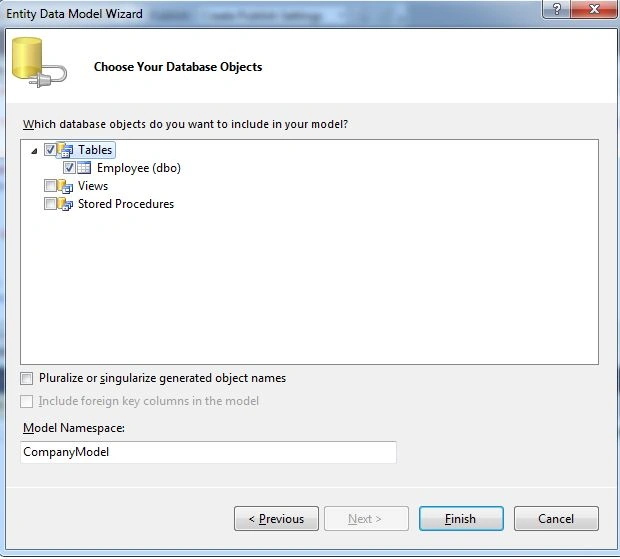
Step 12: Choose the required table and click the "Finish" button.
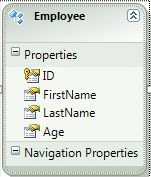
Step 13: The created EDMF and design of data looks like this:
Step 14: The complete code of default.aspx looks like this:
<%@ Page Language="C#" AutoEventWireup="true" CodeBehind="Default.aspx.cs" Inherits="UpdateDataEFAzureApp._Default" %>
<!DOCTYPE html PUBLIC "-//W3C//DTD XHTML 1.0 Transitional//EN" "http://www.w3.org/TR/xhtml1/DTD/xhtml1-transitional.dtd">
<html xmlns="http://www.w3.org/1999/xhtml">
<head id="Head1" runat="server">
<title></title>
</head>
<body>
<form id="form1" runat="server">
<center>
<div>
<table>
<tr>
<td colspan="2">
<asp:Label ID="Label1" runat="server" Text="Update Data to Cloud Database with Azure"
Font-Bold="true" Font-Size="Large" Font-Names="Verdana" ForeColor="Maroon"></asp:Label>
</td>
</tr>
<tr>
<td>
<asp:Label ID="Label6" runat="server" Text="Please Enter Id" Font-Size="Large" Font-Names="Verdana"
Font-Italic="true"></asp:Label>
</td>
<td>
<asp:TextBox ID="TextBox4" runat="server"></asp:TextBox>
</td>
</tr>
<tr>
<td>
<asp:Label ID="Label2" runat="server" Text="Please Enter FirstName" Font-Size="Large"
Font-Names="Verdana" Font-Italic="true"></asp:Label>
</td>
<td>
<asp:TextBox ID="TextBox1" runat="server"></asp:TextBox>
</td>
</tr>
<tr>
<td>
<asp:Label ID="Label3" runat="server" Text="Please Enter LastName" Font-Size="Large"
Font-Names="Verdana" Font-Italic="true"></asp:Label>
</td>
<td>
<asp:TextBox ID="TextBox2" runat="server"></asp:TextBox>
</td>
</tr>
<tr>
<td>
<asp:Label ID="Label4" runat="server" Text="Please Enter Age" Font-Size="Large" Font-Names="Verdana"
Font-Italic="true"></asp:Label>
</td>
<td>
<asp:TextBox ID="TextBox3" runat="server"></asp:TextBox>
</td>
</tr>
<tr>
<td colspan="2" align="center">
<asp:Button ID="Button2" runat="server" Text="Update Data to Cloud Database" Font-Names="Verdana"
Width="272px" BackColor="Orange" Font-Bold="True" OnClick="Button2_Click" />
</td>
</tr>
<tr>
<td colspan="2" align="center">
<asp:Label ID="Label5" runat="server" Font-Bold="true" Font-Names="Verdana" ForeColor="Maroon"></asp:Label>
</td>
</tr>
</table>
</div>
</center>
</form>
</body>
</html>
Step 15: The complete code of default.aspx.cs looks like this:
using System;
using System.Collections.Generic;
using System.Linq;
using System.Web;
using System.Web.UI;
using System.Web.UI.WebControls;
namespace UpdateDataEFAzureApp
{
public partial class _Default : System.Web.UI.Page
{
protected void Page_Load(object sender, EventArgs e)
{
}
protected void Button2_Click(object sender, EventArgs e)
{
if (string.IsNullOrEmpty(TextBox1.Text) || string.IsNullOrEmpty(TextBox2.Text) || string.IsNullOrEmpty(TextBox3.Text) || string.IsNullOrEmpty(TextBox4.Text))
{
Label5.Text = "Please Enter Some Values"; Label5.ForeColor = System.Drawing.Color.Red;
}
else
{
CompanyEntities objCompany = new CompanyEntities();
Employee updateQuery; var id = int.Parse(TextBox4.Text);
updateQuery = (from r in objCompany.Employees where r.ID == id select r).First();
updateQuery.FirstName = TextBox1.Text;
updateQuery.LastName = TextBox2.Text;
updateQuery.Age = int.Parse(TextBox3.Text);
objCompany.SaveChanges();
Label5.Text = "Data Updated Successfully";
Label5.ForeColor = System.Drawing.Color.Green;
TextBox1.Text = string.Empty;
TextBox2.Text = string.Empty;
TextBox3.Text = string.Empty; TextBox4.Text = string.Empty;
}
}
}
}
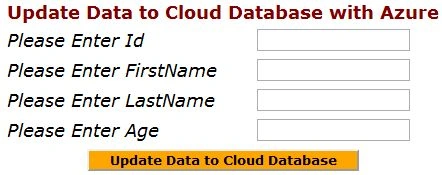
Step 16: The output of the application looks like this:
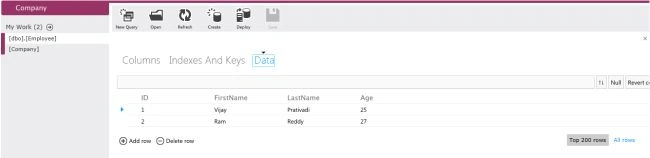
Step 17: The output of table data before inserting the application looks like this:
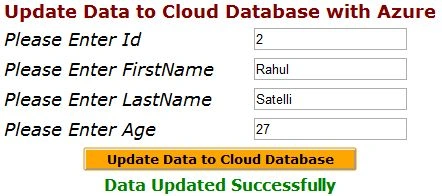
Step 18: Data entering output of the application looks like this:
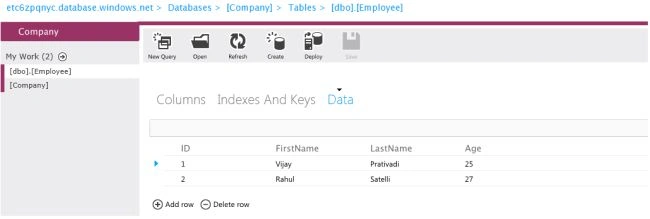
Step 19: Updated data showing on the cloud output of the application looks like this:
Gowtham RajamanickamPosted Apr 20, 2015, 3:22 PM
good one...