

Let’s start,
Step 1
Open Visual Studio, New Project, Templates, Visual C#, Android, then Blank App (Android)
Select Blank App, then give Project Name and Project Location.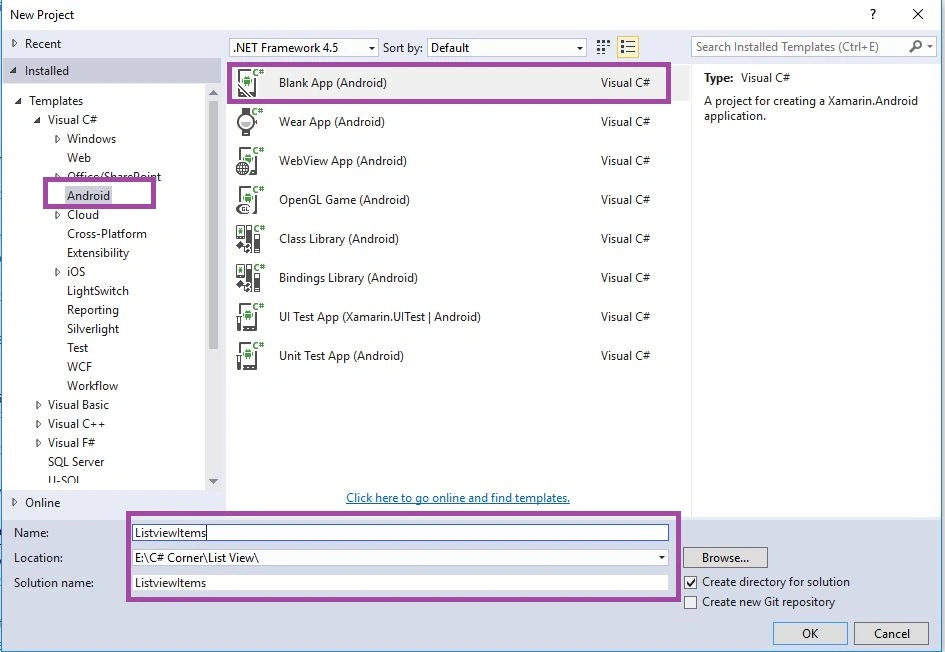
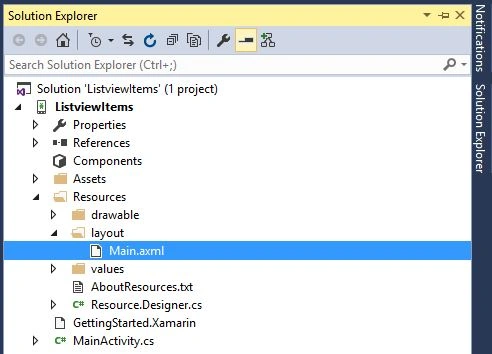
Step 2 - Next, Open Solution Explorer, Project Name, Resources, layout, then Main.axml. After that click Open Design View.
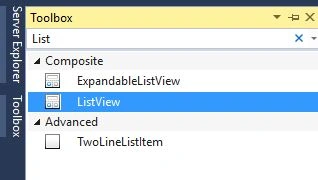
Step 3: Go to Toolbar, select ListView, Drag and Drop in Design Page and then change id as android:id="@+id/listView1".
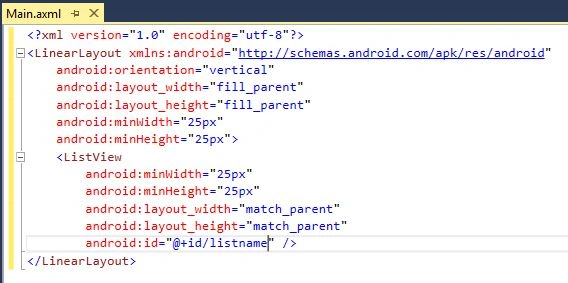
XMLCode
- <?xml version="1.0" encoding="utf-8"?>
- <LinearLayout
- xmlns:android="http://schemas.android.com/apk/res/android"
- android:orientation="vertical"
- android:layout_width="fill_parent"
- android:layout_height="fill_parent"
- android:minWidth="25px"
- android:minHeight="25px">
- <ListView
- android:minWidth="25px"
- android:minHeight="25px"
- android:layout_width="match_parent"
- android:layout_height="match_parent"
- android:id="@+id/listView1" />
- </LinearLayout>
Step 4 - Next, Open Solution Explorer, Project Name, MainAtivity.cs and then click to open C# Code.
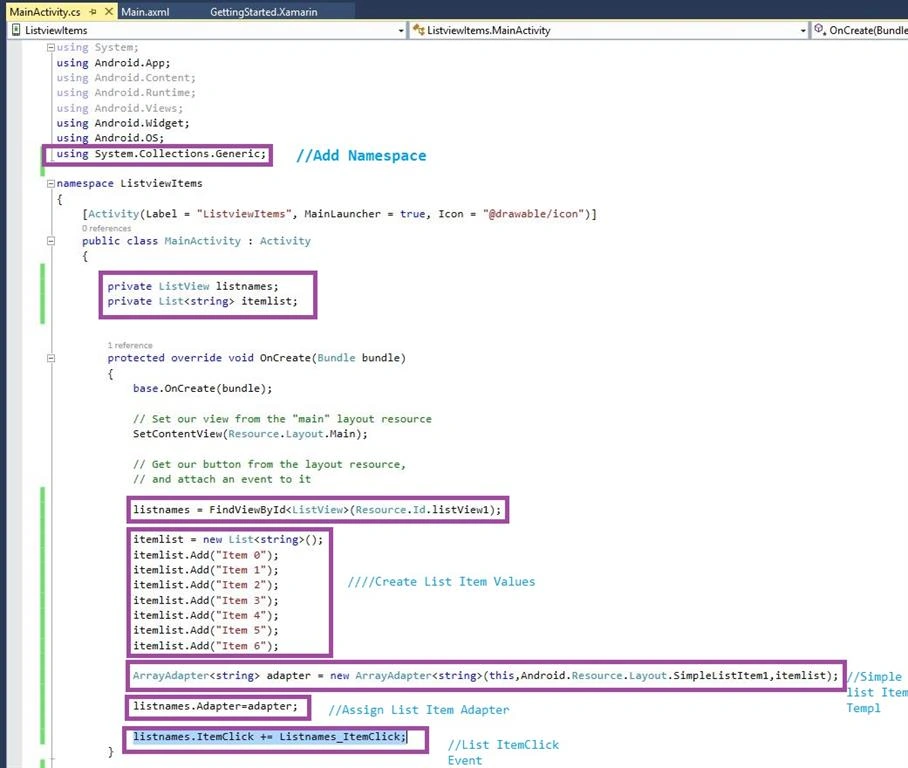
Here, first we add Namespace and then declare variables of ListView items. Go to OnCreate(), create the ListItem Values, then add in Adapter.
Create ListItemClick Event: listnames.ItemClick += Listnames_ItemClick;

Step 5 - Press F5 or Build and Run the Application
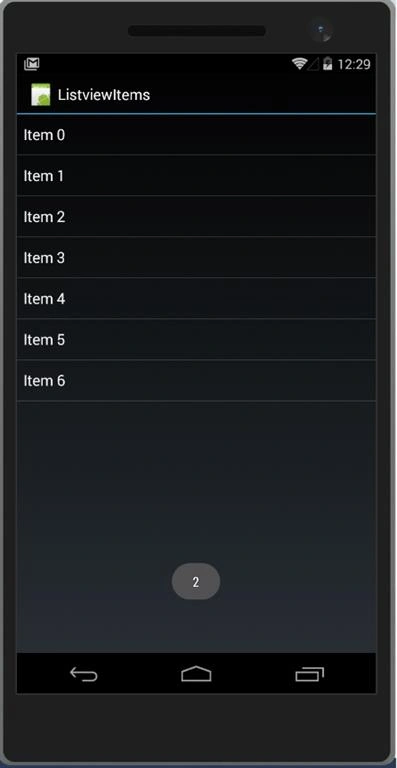
Finally, we have successfully created a Xamarin Android ListView App.
Ravi RanadivePosted Mar 15, 2019, 4:18 AM
Please give me same example for display data in table format
Ravi RanadivePosted Mar 15, 2019, 4:17 AM
Very good example of listview
unalca unalcaPosted Feb 18, 2018, 6:46 AM
Thank you soo much
Muhammad FahimPosted Dec 14, 2017, 5:23 AM
Thank you soo much
Hrishikesh KulkarniPosted Oct 8, 2017, 5:50 AM
Simple and best example
Asad AliPosted Jun 18, 2016, 10:35 AM
Good one
Davronbek UmirovPosted Jun 9, 2016, 2:27 AM
Nice article..
Prasanna MuraliPosted May 20, 2016, 9:30 PM
Nice one...
Vignesh ManiPosted May 13, 2016, 7:18 AM
Nice one
Manoj KulkarniPosted May 12, 2016, 11:04 PM
Nice article. Thank you for sharing
Neeraj KumarPosted May 12, 2016, 3:12 PM
Good ONe
Sonu ChaudharyPosted May 12, 2016, 11:22 AM
Really nice one