
Introduction
Microsoft Power Automate allows you to automate approval processes for business activities such as invoice approvals, leave requests, document reviews, and purchase requests.
The Approval action helps you send approval requests to specific users and process their responses automatically. Instead of manually sending emails and tracking responses, you can create a flow that manages the approval process.
What Is the Approval Action in Power Automate?
The Approval action is used to request approval from one or more users. Approvers can review the request and respond with options such as Approve or Reject.
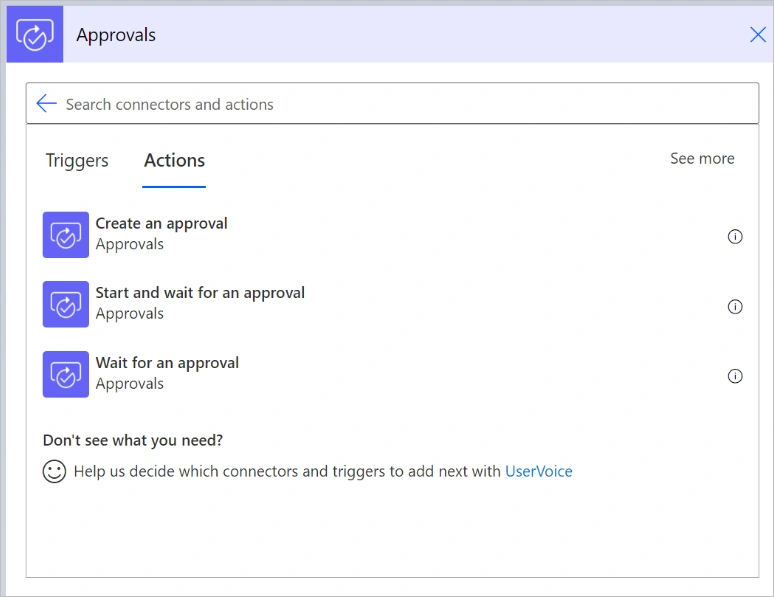
Power Automate provides actions such as:
- Start and wait for an approval: Creates an approval request and waits for the approver's response.
- Create an approval: Creates an approval request without waiting for the response in the same action.
- Wait for an approval: Waits for a previously created approval to receive a response.
These actions are available through the Approvals connector.
Types of Approval
Power Automate supports different approval types depending on your business requirements.
| Approval type | Description |
|---|---|
| Approve/Reject – First to respond | The first approver to respond determines the outcome. |
| Approve/Reject – Everyone must approve | Every assigned approver must approve the request. |
| Custom Responses – Wait for one response | Allows you to define custom response options. |
| Custom Responses – Wait for all responses | Collects responses from all assigned approvers. |
Example: Create an Invoice Approval Flow
Suppose an organization uses a SharePoint list to store invoice details. When a new invoice is submitted, the finance manager must review and approve it.
If the invoice is approved, its status should change to Approved. If the invoice is rejected, its status should change to Rejected.
Step 1: Create an Automated Cloud Flow
- Open Power Automate.
- Select Create.
- Choose Automated cloud flow.
- Enter the flow name:
Invoice Approval Flow. - Select the SharePoint trigger When an item is created.
- Select your SharePoint site and invoice list.
This trigger starts the flow whenever a new invoice item is created.
Step 2: Add the Start and Wait for an Approval Action
- Select New step.
- Search for Start and wait for an approval.
- Select the action from the Approvals connector.
- Configure the following fields:
| Field | Example value |
|---|---|
| Approval type | Approve/Reject – First to respond |
| Title | Invoice Approval Required |
| Assigned to | [email protected] |
| Details | Please review the invoice and approve or reject it. |
| Item link | Link to the SharePoint invoice item |
| Item link description | View Invoice Details |
Use dynamic content from the SharePoint trigger where appropriate. For example, include the invoice number and amount in the approval title or details.
Step 3: Add a Condition
After the approval action, add a Condition action.
Configure the condition as follows:
- Left value: Outcome from the approval action
- Operator: is equal to
- Right value:
Approve
The flow now follows different paths depending on the approver's response.
Step 4: Update the Invoice Status
If Yes — Approved
Add the SharePoint Update item action.
- Site Address: Your SharePoint site
- List Name: Your invoice list
- ID: ID from the trigger
- Invoice Status: Approved
Populate any other required SharePoint columns with their existing values.
If No — Rejected
Add another Update item action in the No branch.
- Site Address: Your SharePoint site
- List Name: Your invoice list
- ID: ID from the trigger
- Invoice Status: Rejected
You can also add a rejection notification email to inform the invoice submitter.
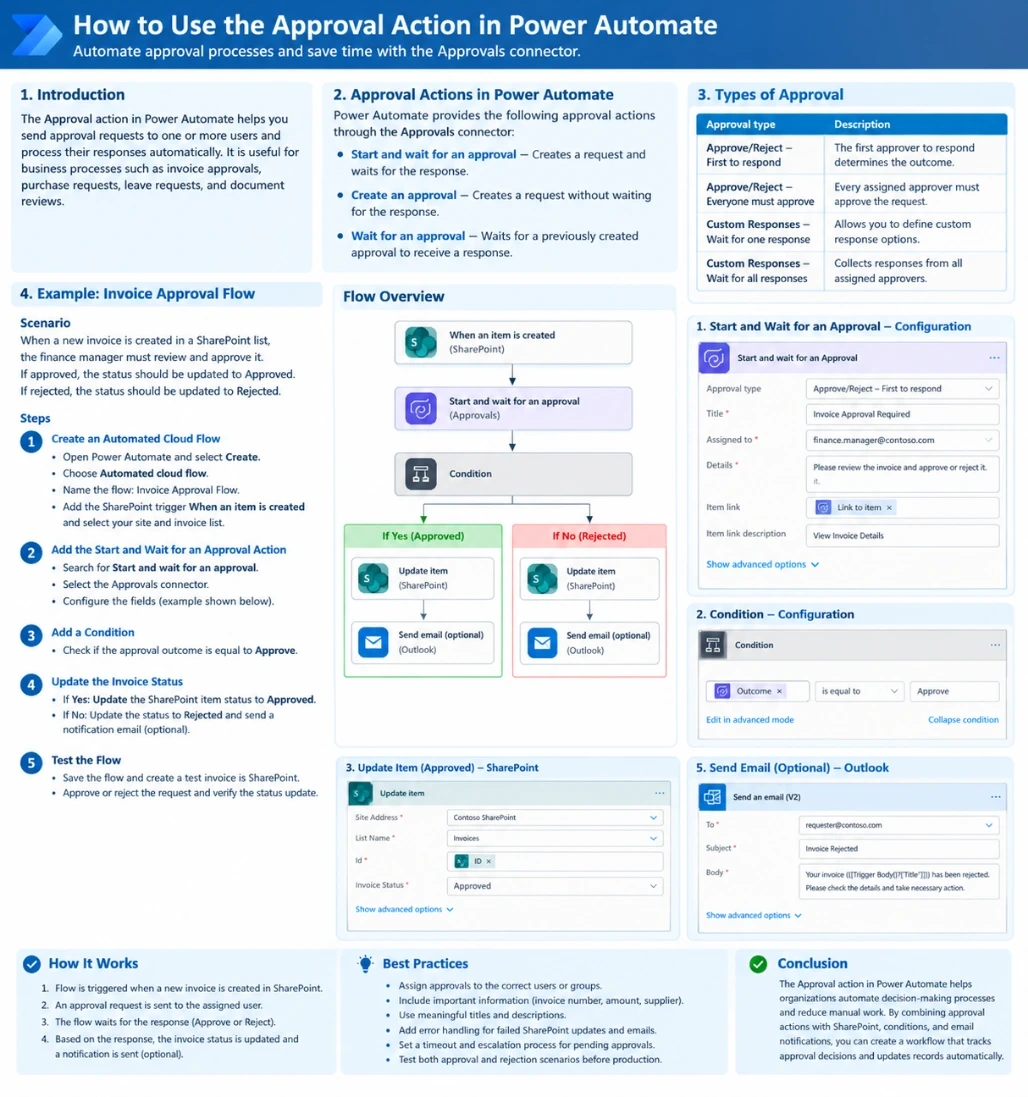
Complete Flow Structure
The overall flow looks like this:
- When an item is created in SharePoint
- Start and wait for an approval
- Condition: Is the outcome equal to Approve?
- If Yes: Update invoice status to Approved
- If No: Update invoice status to Rejected
- Optionally, send an email notification
Step 5: Test the Flow
- Save the flow.
- Create a test invoice in SharePoint.
- Check whether the approval request is sent to the assigned approver.
- Open the request in the Approvals section of Power Automate or through the approval notification.
- Approve or reject the request.
- Verify that the SharePoint invoice status is updated correctly.
Conclusion
The Approval action in Power Automate helps organizations automate decision-making processes and reduce manual work. By combining approval actions with SharePoint, conditions, and email notifications, you can create a workflow that tracks approval decisions and updates records automatically.
This approach can be used for invoice approvals, purchase requests, employee leave requests, document reviews, and many other business processes.

Join the conversation! Your thoughts help the community grow.